Description
The objective of this function is to enable the integration of SPORIFY with the Veeva Vault.
-
The administrator should be able to connect their SPORIFY managed data with the Veeva vault.
-
The administrator should be able to view and manage this integration via the following areas: Connection, Manual Sync, Scheduled Sync, Job Log, Mapping Configuration, and Sync Configuration.
Overview
.png?cb=b8d85dfa14ff0d6fd0bdf4058312700e)
Procedure
-
Login to SPORIFY.
-
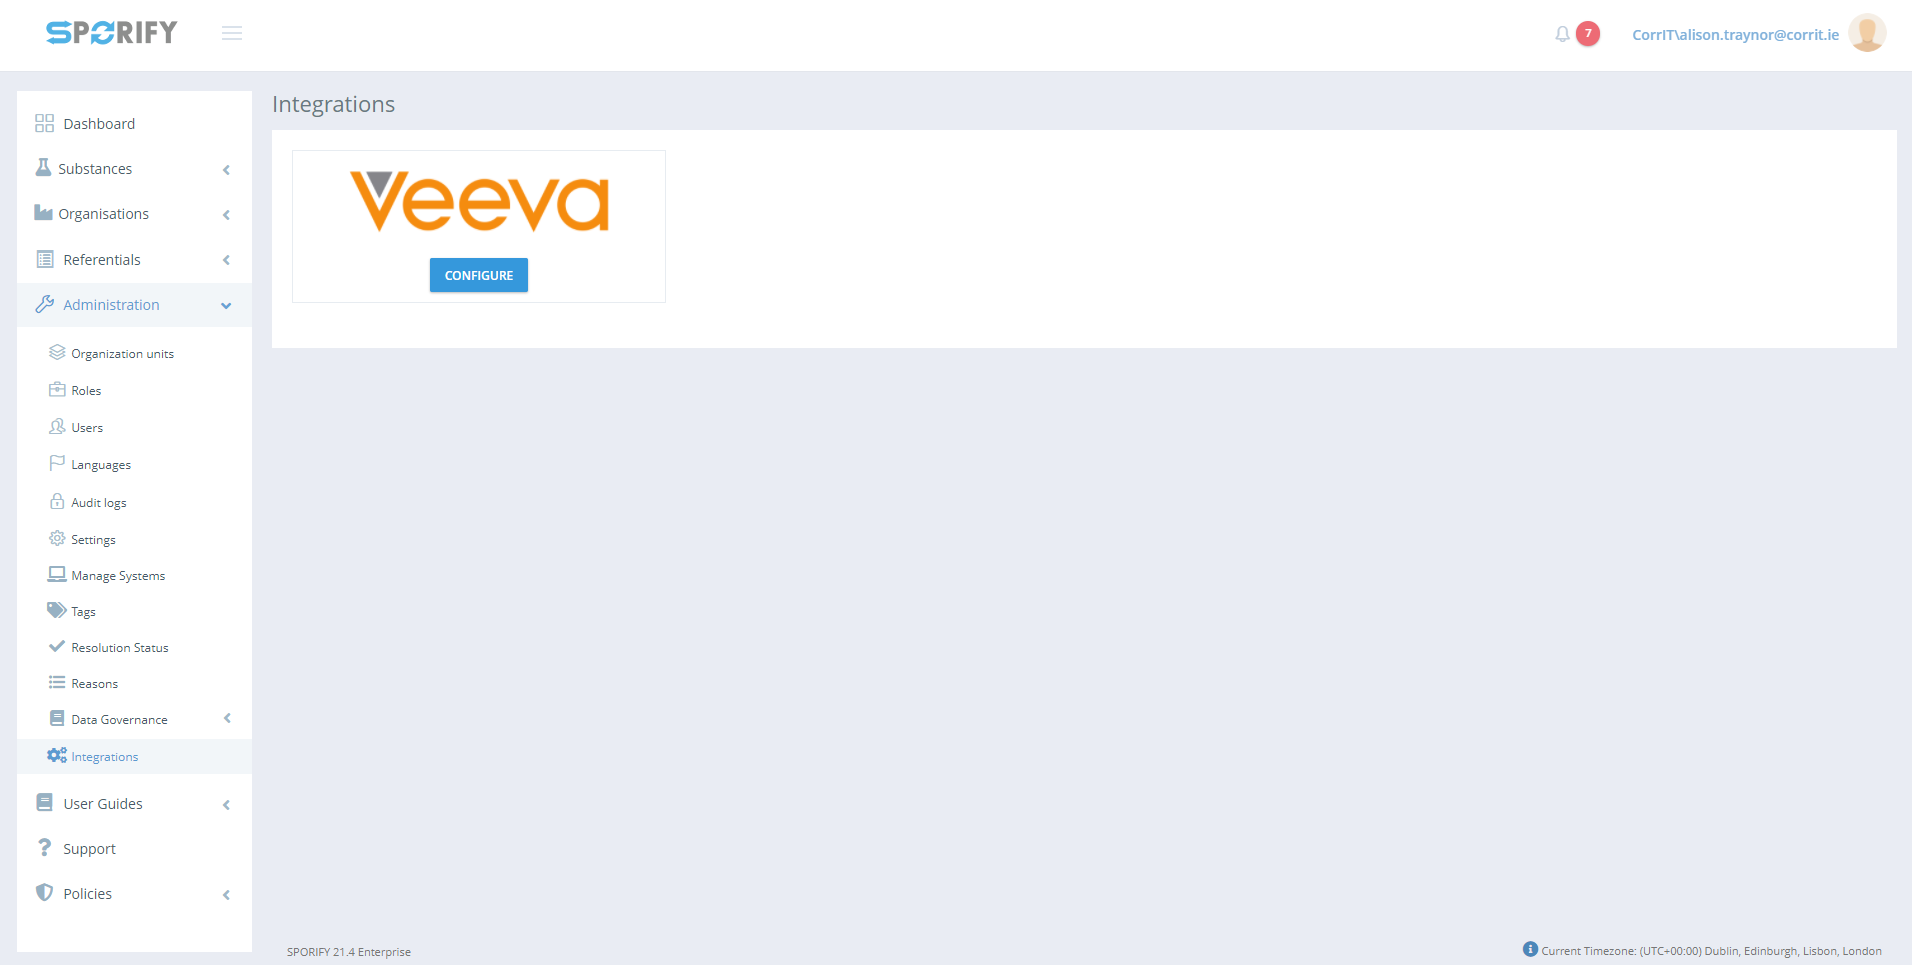
Select Administration on the left-hand navigation menu.
-
Click Integrations to navigate to the Integrations screen.
-
Click the Veeva Configure button.
-
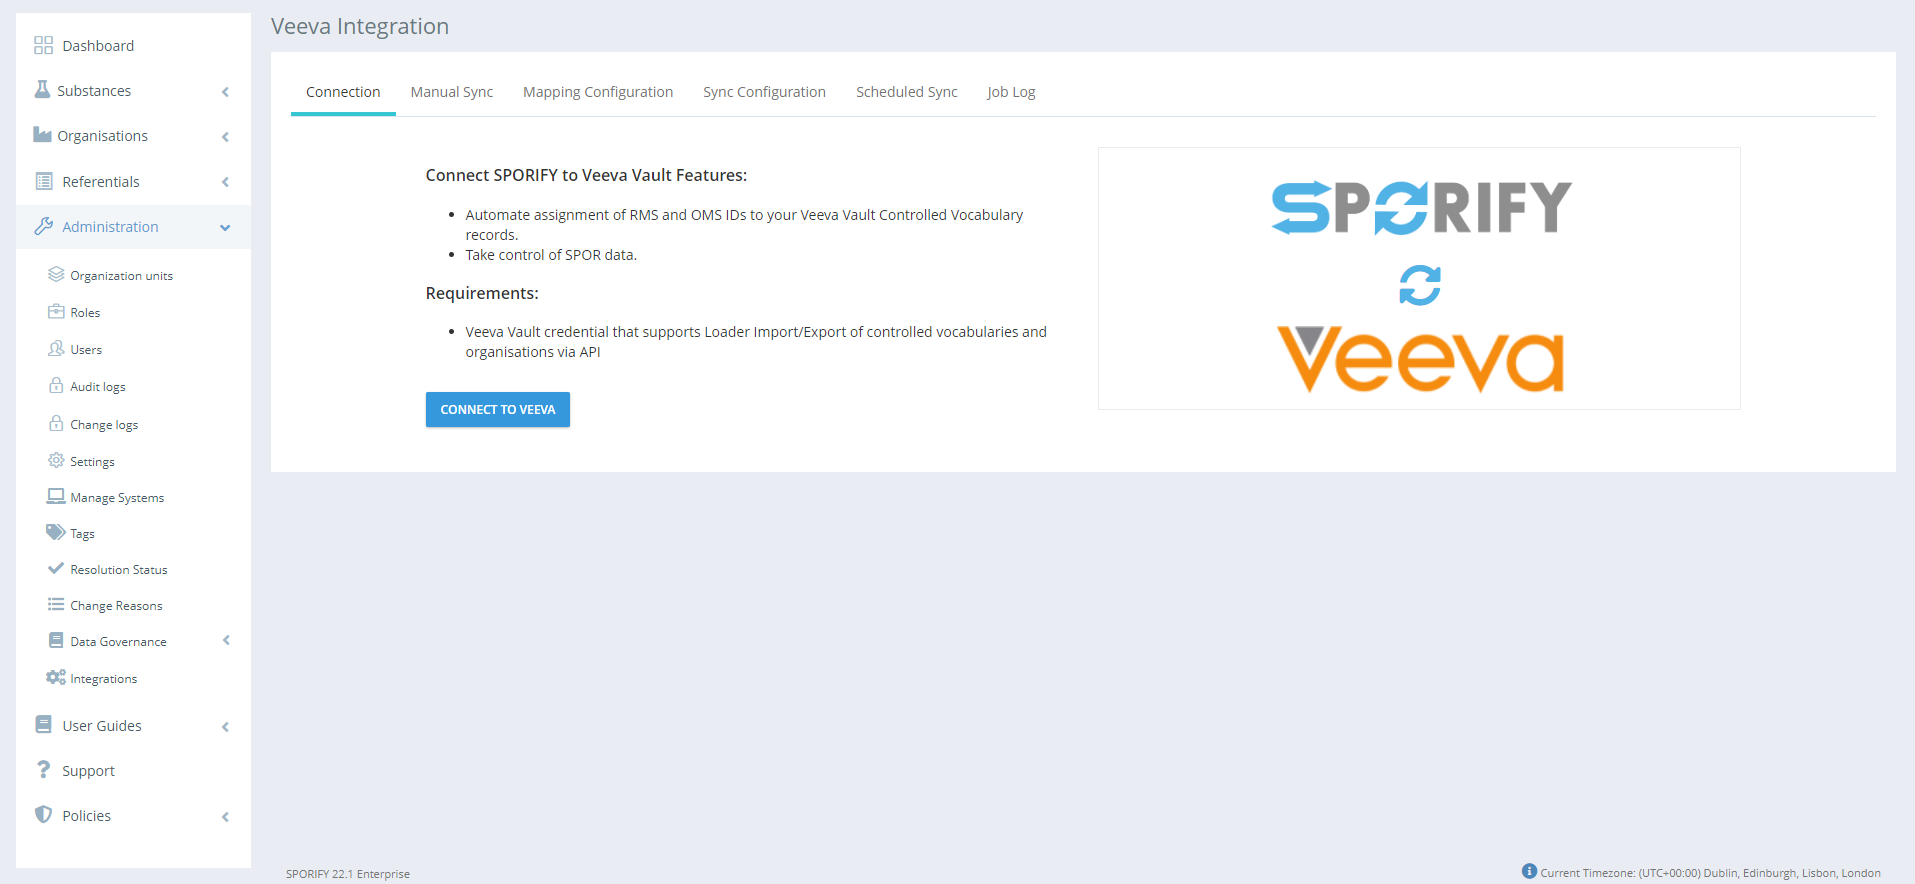
Using the Connection tab, carry out the following actions:
-
Press the Connect To Veeva button.
-
On the Veeva Connection modal:
-
Insert the relevant vault subdomain in the Vault Subdomain textbox.
-
Using the User Name and Password tab:
-
Insert the relevant username in the Username textbox.
-
Insert the relevant password in the Password textbox.
-
Users can test their credentials before proceeding.
-
-
Click Save to save the inserted connection credentials and connect to Veeva.
-
Else, click Cancel to close the Veeva Connection modal without saving.
-
-
-
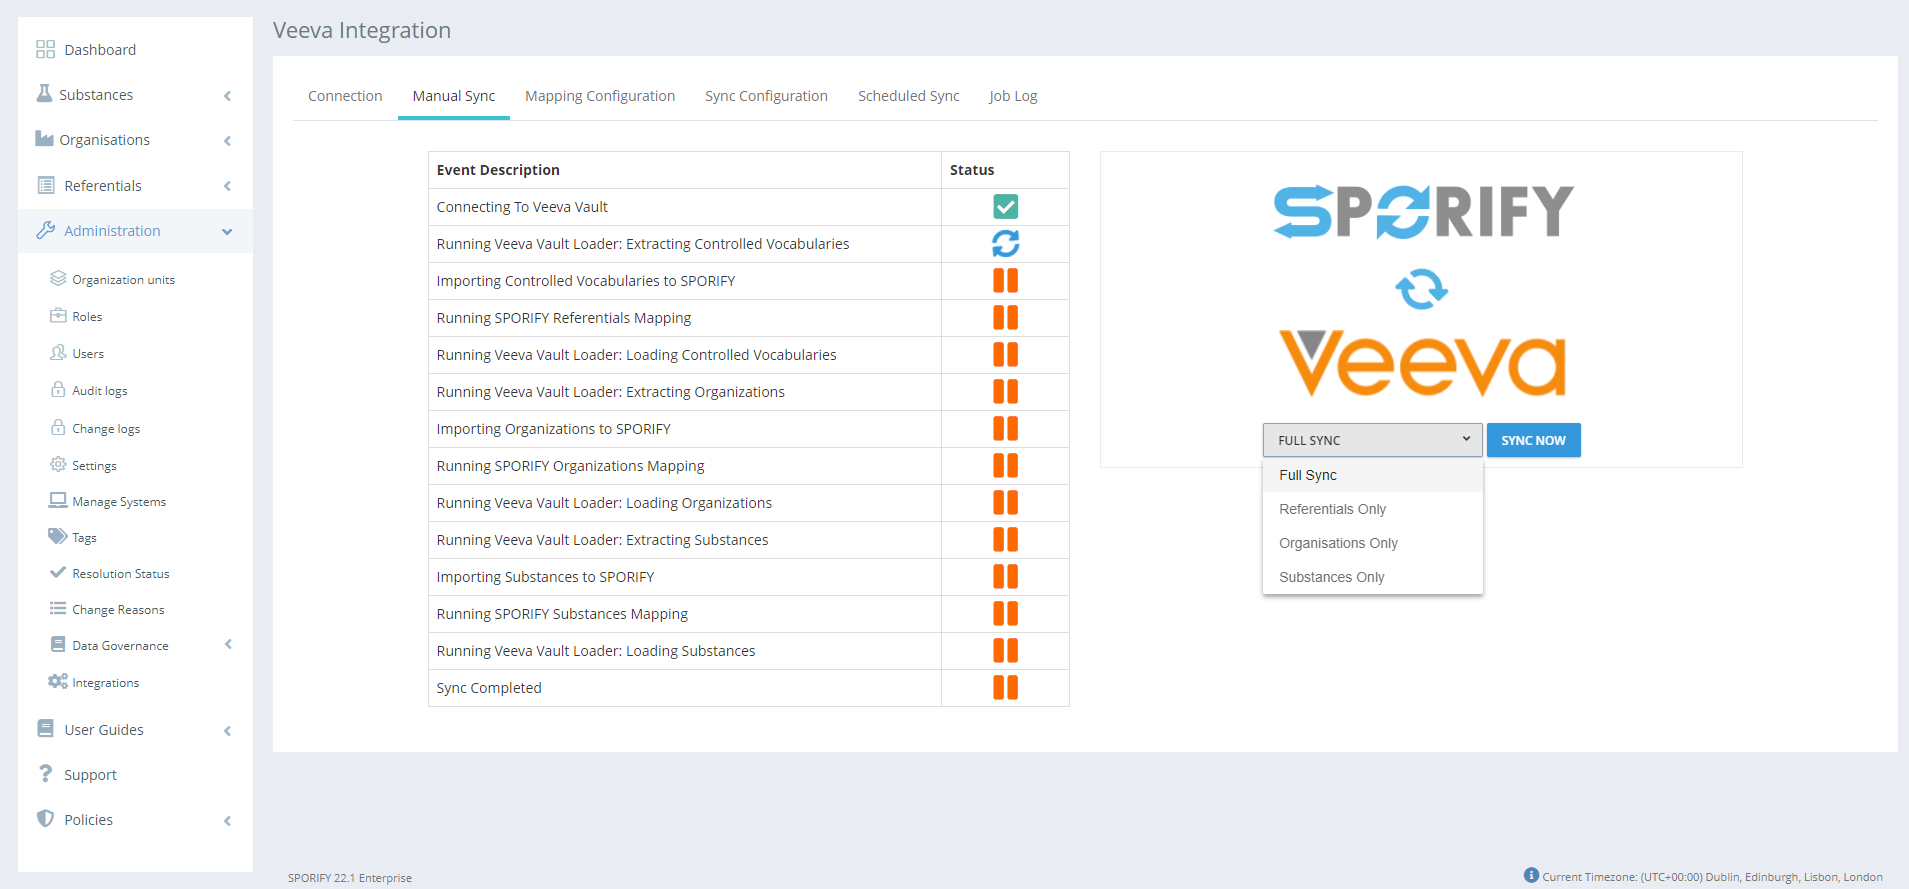
Using the Manual Sync tab, carry out the following actions:
-
Click on the presented drop-down menu and select from the following options:
-
Full Sync
-
Referentials Only
-
Organisations Only
-
Substances Only
-
-
Click the Sync Now button to start the synchronisation process.
-
-
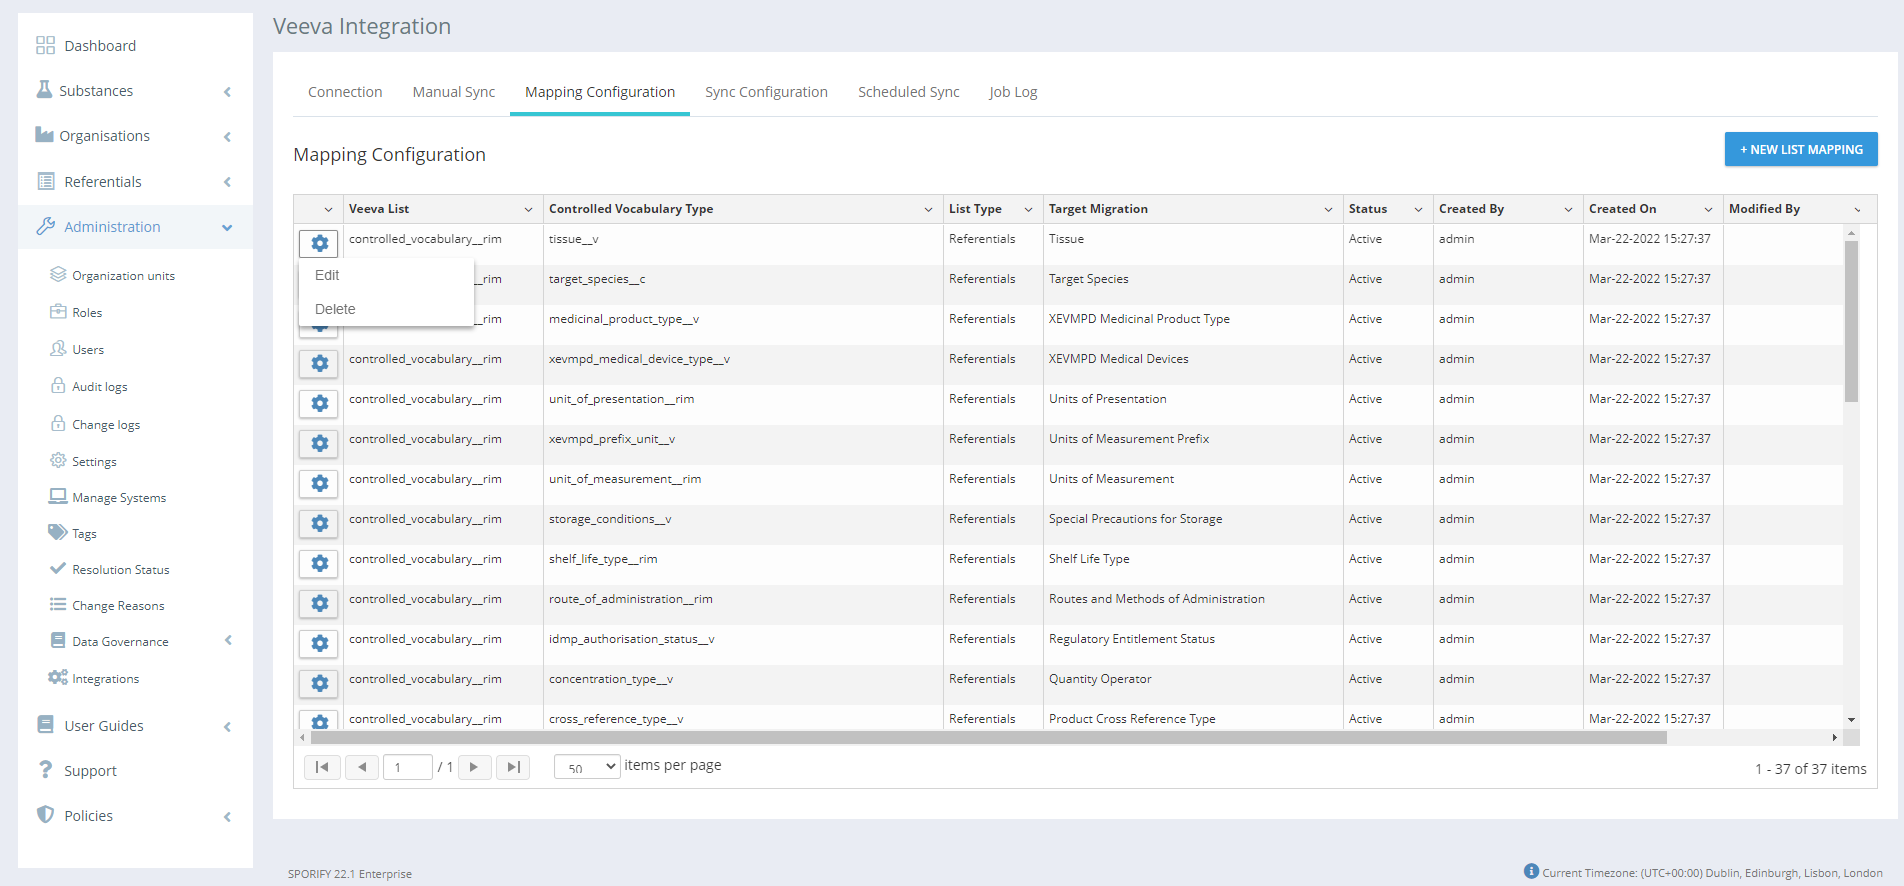
Using the Mapping Configuration tab, carry out the following actions:
-
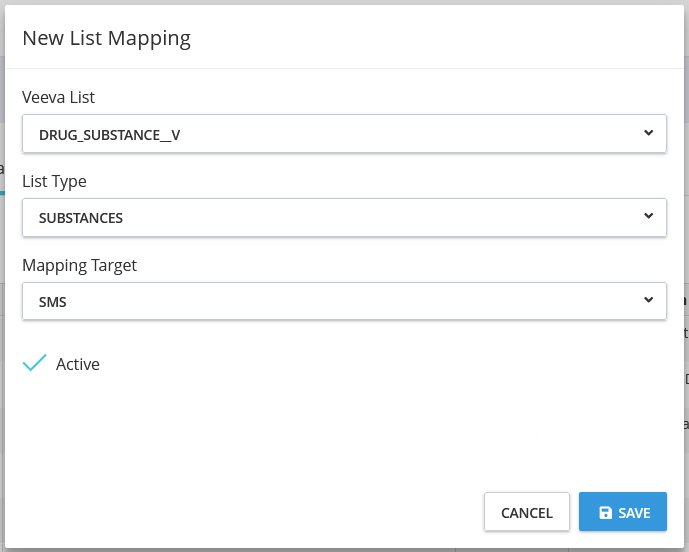
To add a new list mapping, click the New List Mapping button.
-
On the New List Mapping modal, complete the following fields:
-
Veeva List (Drop-down menu)
-
List Type (Drop-down menu)
-
Mapping Target (Drop-down menu)
-
Active (Checkbox)
-
-
Click Save to save the new list mapping.
-
Else, click Cancel to discard the new list mapping.
-
-
Click on the relevant list’s cog icon and select from the following options:
-
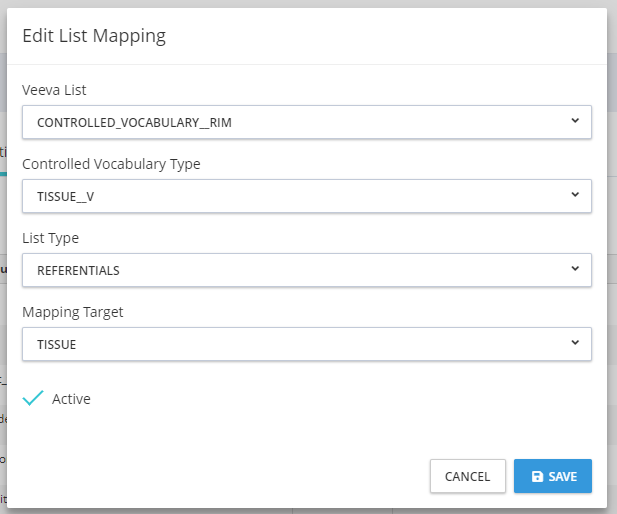
Edit
-
Make any desired changes on the presented modal.
-
Click Save to save the changes.
-
Else, click Cancel to discard the changes.
-
-
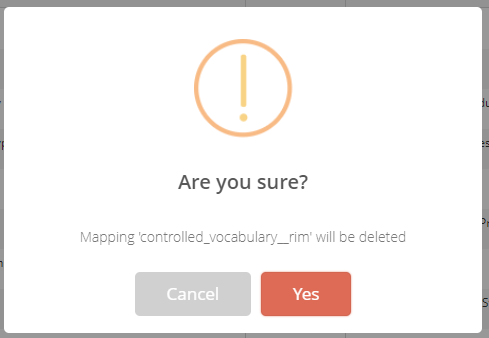
Delete
-
Click Yes to complete the deletion.
-
Else, click Cancel to discard the deletion.
-
-
-
-
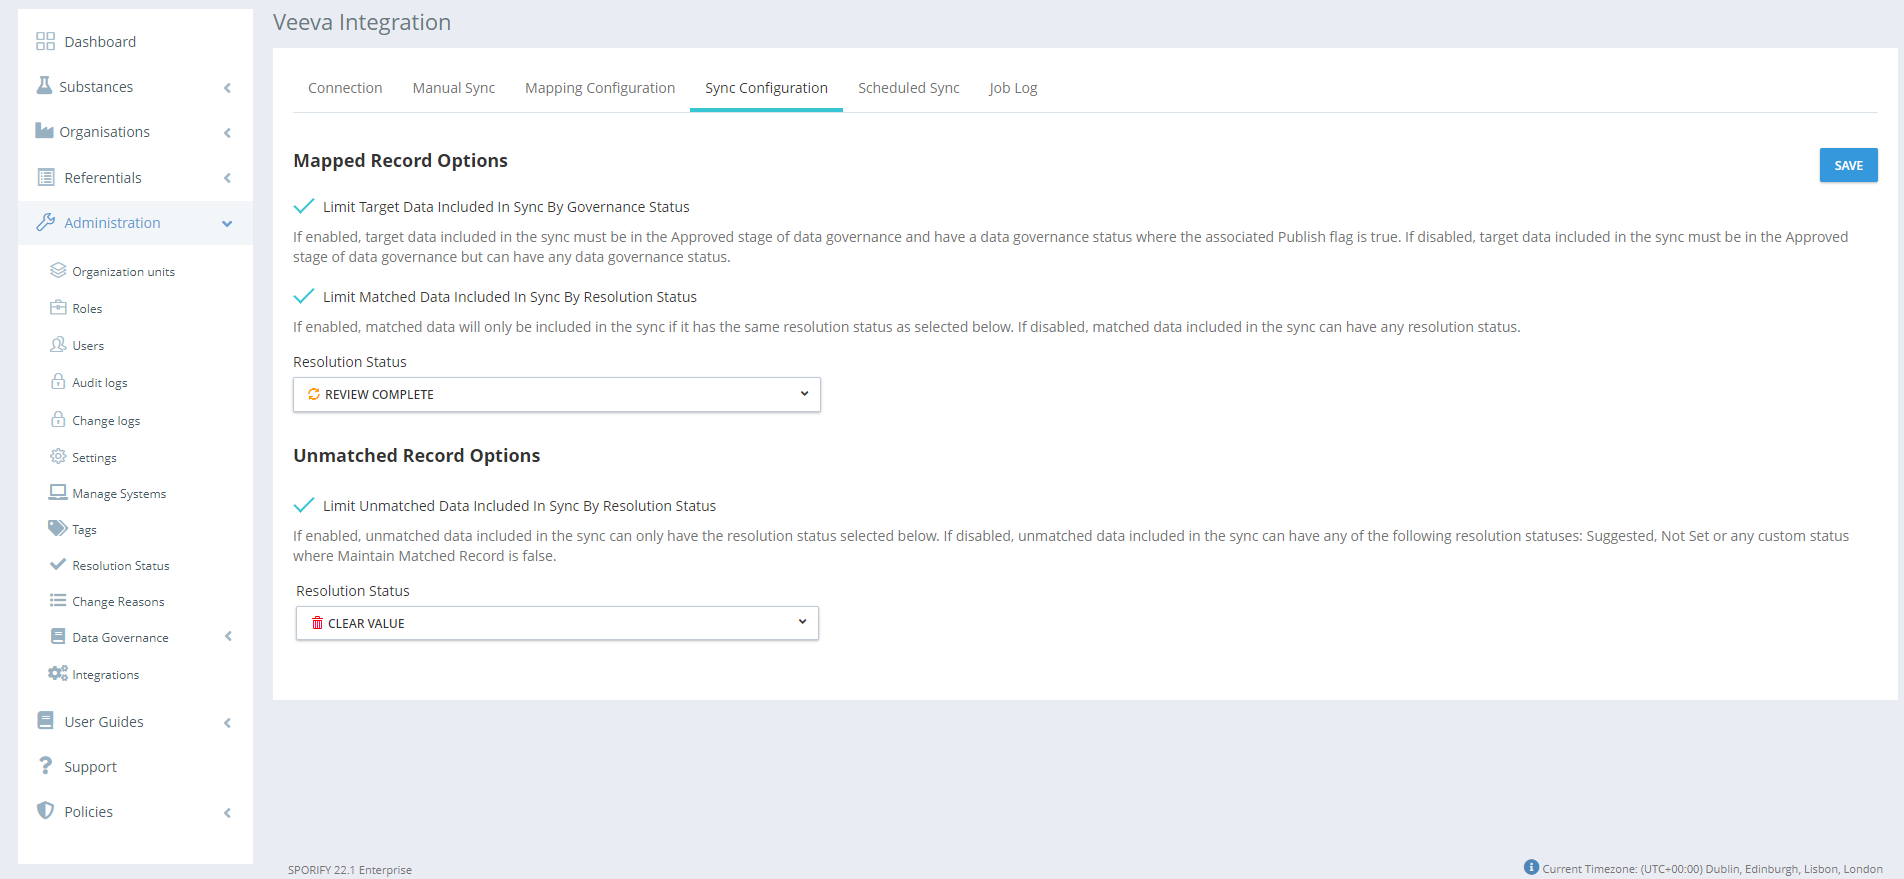
Using the Sync Configuration tab, complete the following fields:
-
Limit Matched Data Included In Sync By Governance Status
-
If enabled, target data included in the sync must be in the Approved stage of data governance and have a data governance status where the associated Publish flag is true.
-
If disabled, target data included in the sync must be in the Approved stage of data governance but can have any data governance status.
-
-
Limit Matched Data Included In Sync By Resolution Status
-
If enabled, matched data will only be included in the sync if the associated resolution status is the one selected here.
-
If disabled, matched data included in the sync can have any resolution status.
-
If this setting is enabled, use the provided multi-select menu to select the relevant status(es).
-
-
Limit Unmatched Data Included In Sync By Resolution Status
-
If enabled, unmatched data included in the sync can only have the resolution status selected below.
-
If disabled, unmatched data included in the sync can have any of the following resolution statuses: Suggested, Not Set or any custom status where Maintain Matched Record is false.
-
If this setting is enabled, use the provided multi-select menu to select the relevant status(es).
-
-
-
Click Save.
-
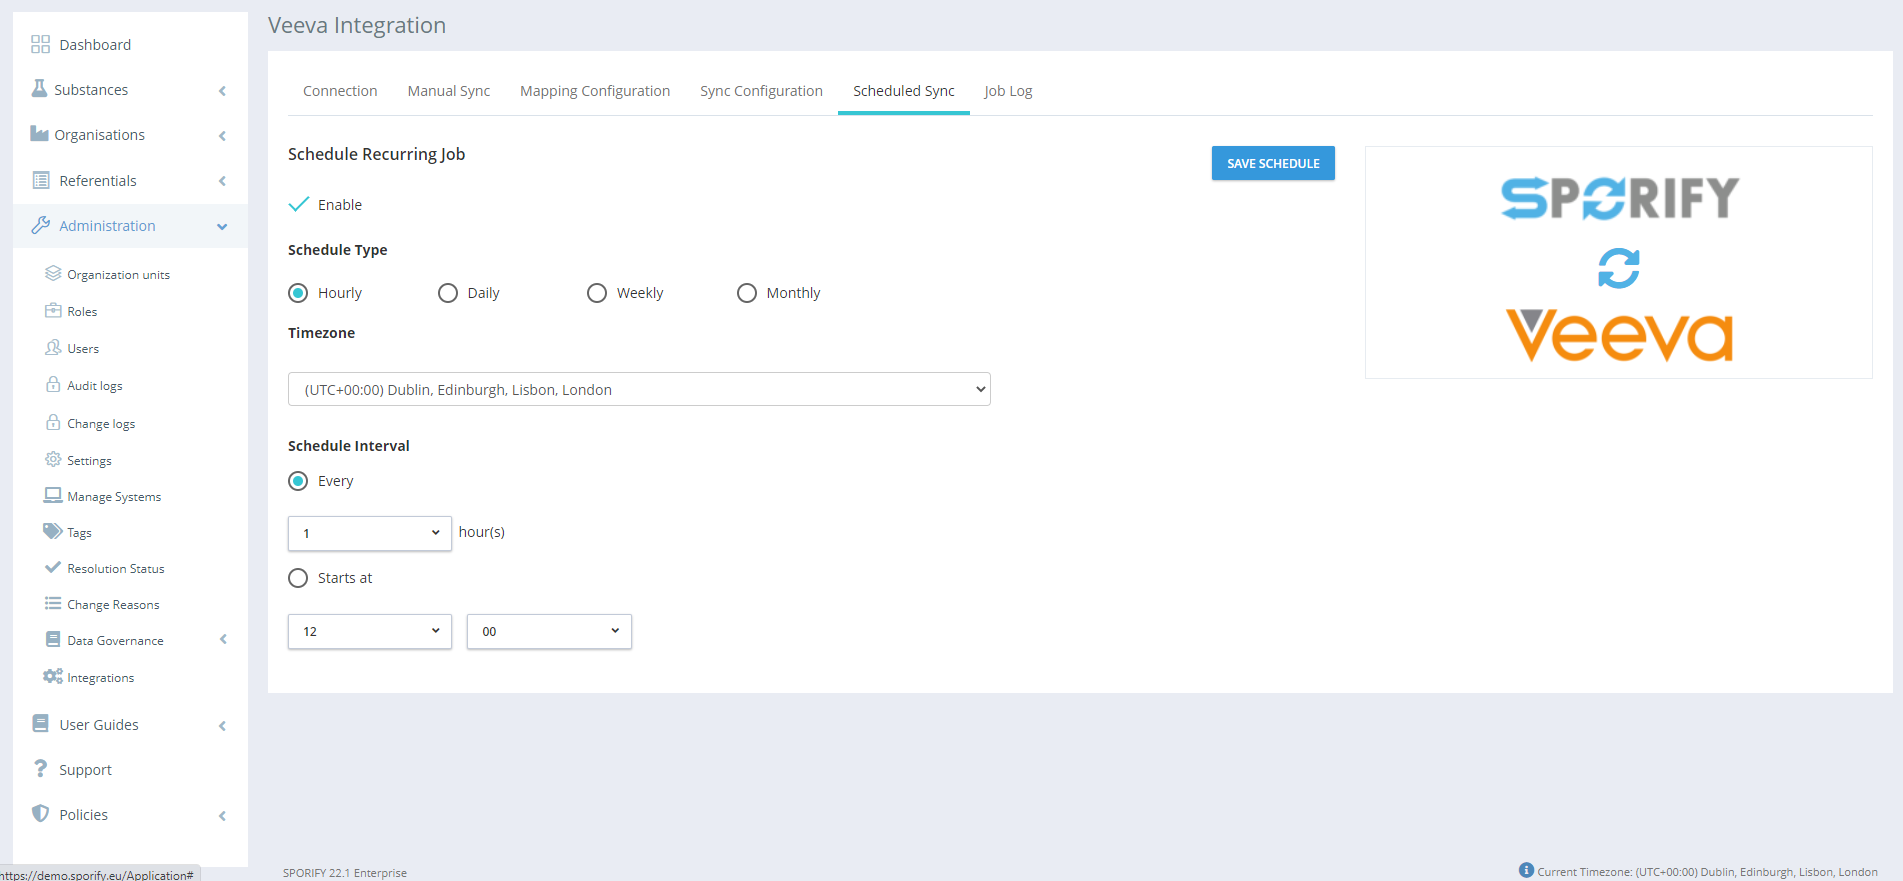
Using the Scheduled Sync tab, carry out the following actions:
-
To enable scheduled synchronisation, check the Enable checkbox.
-
Else, to disable scheduled synchronisation, uncheck the Enable Schedule checkbox.
-
When the Enable Schedule checkbox is True, select from the presented options:
-
Hourly
-
Timezone
-
Every [Number] hour(s)
-
Starts at [Hour]:[Minute]
-
-
Daily
-
Timezone
-
Everyday
-
Every Weekday
-
Starts at [Hour]:[Minute]
-
-
Weekly
-
Timezone
-
Weekdays
-
Starts at [Hour]:[Minute]
-
-
Monthly
-
Timezone
-
Day [Number] of every [Number] month(s)
-
The [Number] [Day of the Week] of every [Number] month(s)
-
Starts at [Hour]:[Minute]
-
-
-
Click Save Schedule to save the scheduled sync.
-
-
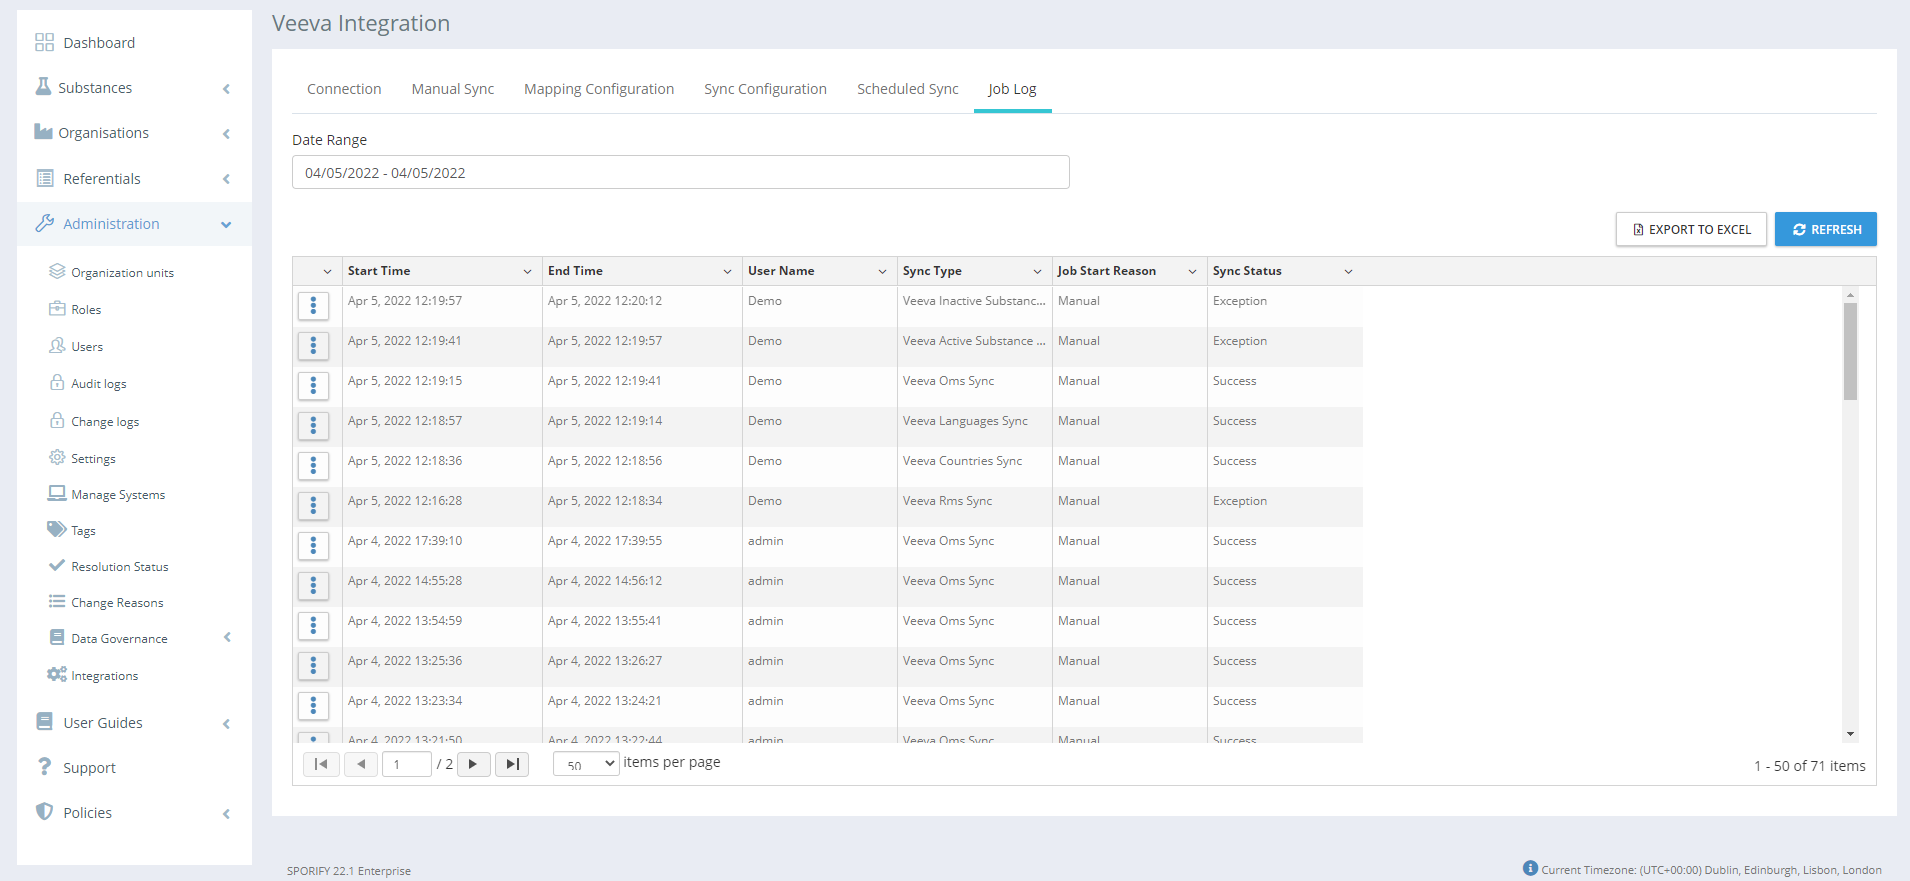
Using the Job Log tab, carry out the following actions:
-
A grid is presented with the following sortable columns:
-
Start Time
-
End Time
-
Username
-
Sync Type
-
Job Start Reason
-
Sync Status
-
-
Click the Export to Excel button to export the job log.
-
Use the Date Range field and click Refresh to filter the job log by date range.
-
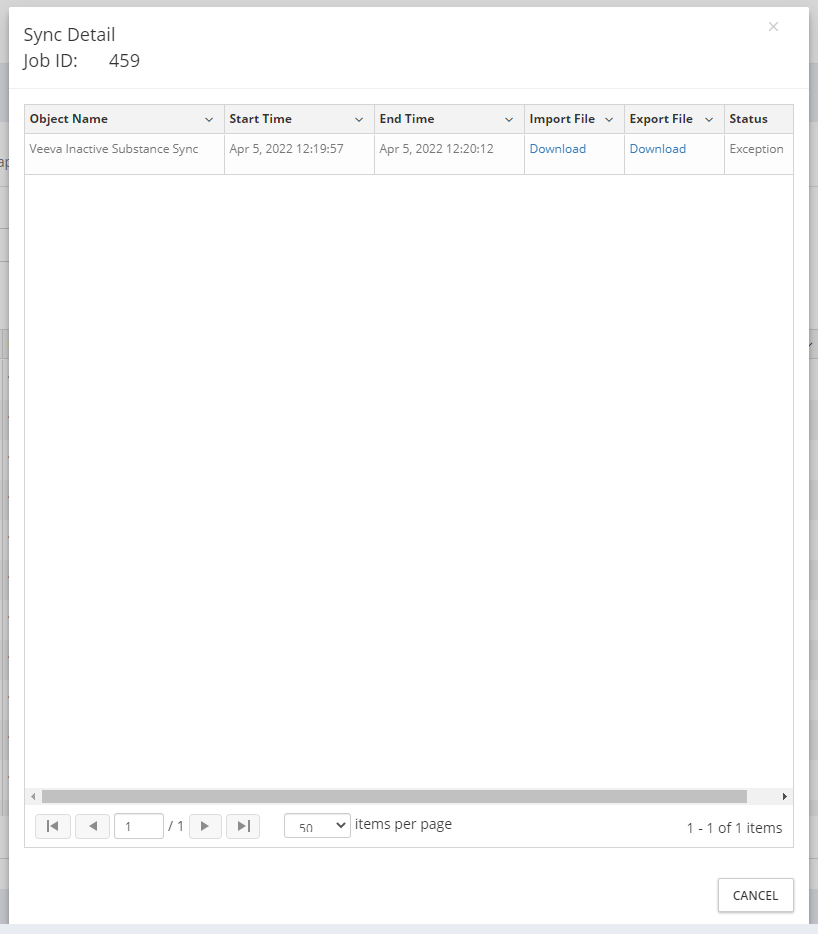
Click on a job’s associated Actions icon and select Sync Detail to view further details about the job.
-
Username and password management
When the user configures the account for Veeva Integration, the mandatory username and password is consumed via the front end of SPORIFY. While saving the username and password, both values are securely transmitted via encrypted SSL connection from the local browser of the user to the SPORIFY server. The SPORIFY server encrypts the password explicitly with the algorithm Rijndael (superset of AES, see https://en.wikipedia.org/wiki/Advanced_Encryption_Standard ), using a server-side passphrase and salt to encrypt the user’s account password. The server-side passphrase is 256 bytes and 32 salts in size. Both are securely stored in the compiled executables of SPORIFY itself. SPORIFY saves the encrypted password value, and the username is in the database via encrypted connection. Every time the sync is initiated, either manually or scheduled, the Veeva Integration component decrypts the password and uses decrypted values to talk via secure SSL connection to the Veeva API.
Acceptance Criteria
We succeed only if SPORIFY can be integrated with the Veeva Vault.
-
Verify that SPORIFY administrators can connect with the Veeva Vault using a relevant username and password
-
Verify that administrators can carry out manual syncs using the Veeva Integration screen.
-
Verify that administrators can set and manage scheduled syncs using the Veeva Integration screen.
-
Verify that job logs can be viewed and exported via the Veeva Integration screen.
-
Verify that mapping configurations can be added and managed via the Veeva Integration screen.
-
Verify that synchronisation configurations can be added and managed via the Veeva Integration screen.
-
Verify that users can select all available CVs from Veeva when populating the integration screen.
-
Verify that all source lists under the Veeva source system are read only.
-
Verify when mapping configuration changes, on the next synchronization relevant source list are updated.
Related / Alternative Procedure
N/A
Example
N/A
GUI Specification
Purpose of these GUI elements
The purpose of these GUI elements is to enable the administrator to integrate SPORIFY with the Veeva Vault and manage this integration.
Mockups and Screenshots
GUI Elements
|
Mockup of GUI Element |
Title |
Default |
Enabled |
Type |
Data |
Description |
|---|---|---|---|---|---|---|

|
Vault Subdomain |
Empty |
Always |
Textbox |
String |
The relevant Vault subdomain is inserted here. |

|
User Name |
Empty |
Always |
Textbox |
String |
The relevant Veeva username is inserted here. |

|
Password
|
Empty
|
Always
|
Textbox
|
String
|
The relevant Veeva password is inserted here. |
|
|
Manual Sync Type |
Full Sync |
Always |
Drop-down menu |
String |
Manual sync type is selected here. |
|
|
Enable Schedule |
False |
Always |
Checkbox |
Boolean |
If True, scheduled sync options are presented. If False, scheduled sync is disabled. |
|
|
Hourly |
False |
Always |
Radio button |
Boolean |
If True, hourly schedule options are presented. |
|
|
Daily |
False |
Always |
Radio button |
Boolean |
If True, daily schedule options are presented. |
|
|
Weekly |
False |
Always |
Radio button |
Boolean |
If True, weekly schedule options are presented. |
|
|
Monthly |
False |
Always |
Radio button |
Boolean |
If True, monthly schedule options are presented. |
|
|
Every [Number] hour(s) |
1 |
Always |
Radio button, drop-down menu |
Boolean, numerical |
The sync frequency is selected here. |
|
|
Starts at [Hour]:[Minute] |
12:00 |
Always |
Radio button, drop-down menus |
Boolean, numerical |
The sync start time is selected here. |
|
Timezone |
Empty |
Always |
Drop-down menu |
String |
The relevant timezone for the sync is selected here. |
|
|
Everyday |
True |
Always |
Radio button |
Boolean |
If True, the sync occurs everyday. If False, the sync does not occur everyday. |
|
|
Every weekday |
False |
Always |
Radio button |
Boolean |
If True, the sync occurs every weekday. If False, the sync does not occur every weekday. |

|
Day |
Empty |
Always |
Multiselect drop-down menu |
String |
The day of the week on which the sync occurs is selected here. |
|
|
Day [Number] of every [Number] month(s) |
1, 1 |
Always |
Radio button, drop-down menus |
Boolean, numerical |
The day and frequency of the sync is selected here. |
|
|
The [Number] [Day] of every [Number] month(s) |
First, Monday, 1 |
Always |
Radio button, drop-down menus |
Boolean, numerical, string |
The day and frequency of the sync is selected here. |

|
Veeva List |
Empty |
Always |
Drop-down menu |
String |
The relevant Veeva List is selected here. |

|
List Type |
Empty |
Always |
Drop-down menu |
String |
The relevant List Type is selected here. |

|
Mapping Target |
Empty |
Always |
Drop-down menu |
String |
The relevant Mapping Target is selected here. |
|
|
Active |
True |
Always |
Checkbox |
Boolean |
The mapping is set to Active/Inactive here. |
|
|
Limit Matched Data Included In Sync By Resolution Status |
True |
Always |
Checkbox |
Boolean |
The limit matched data by resolution status setting is switched on/off here. |
|
|
Limit Target Data Included In Sync By Governance Status |
True |
Always |
Checkbox |
Boolean |
The limit target data by governance status setting is switched on/off here. |
|
|
Limit Unmatched Data Included In Sync By Resolution Status |
True |
Always |
Checkbox |
Boolean |
The limit unmatched data included in sync by resolution status is switched on/off here. |
|
|
Resolution Status |
If associated with ‘Limit Matched Data Included In Sync By Resolution Status’ checkbox: Review Required. If associated with ‘Limit Unmatched Data Included In Sync By Resolution Status’ checkbox: Review Complete. |
When associated checkbox is True. |
Drop-down menu |
String |
The relevant Resolution Status is selected here. |
Available Actions And Commands
|
Mockup of GUI Element |
Title |
Enabled |
Type |
Role/Permission |
Action |
Tooltip |
Audit Trail |
|---|---|---|---|---|---|---|---|
|
|
Configure |
Always |
Button |
Administration - Integrations |
Configures Veeva integration |
N/A |
No |
|
|
Connect To Veeva |
Always |
Button |
Administration - Integrations |
Presents the Veeva Connection modal |
N/A |
No |
|
|
Cancel |
Always |
Button |
Administration - Integrations |
Closes modal without saving |
N/A |
No |

|
Save |
Always |
Button |
Administration - Integrations |
Saves inserted information |
N/A |
Yes |
|
|
Sync Now |
Always |
Button |
Administration - Integrations |
Runs manual sync |
N/A |
Yes |
|
|
Save Schedule |
Always |
Button |
Administration - Integrations |
Saves scheduled sync |
N/A |
Yes |
|
|
Export to Excel |
Always |
Button |
Administration - Integrations |
Exports job log details to Excel |
N/A |
Yes |
|
|
New List Mapping |
Always |
Button |
Administration - Integrations |
Presents New List Mapping modal |
N/A |
No |
|
|
Actions |
Always |
Button |
Administration - Integrations |
Presents associated options, e.g. Edit, Delete… |
N/A |
No |
Related Documentation and Sources
-
https://corritltd.visualstudio.com/Sporify/_boards/board/t/Sporify Team/Stories/?workitem=4345
-
https://corritltd.visualstudio.com/Sporify/_boards/board/t/Sporify Team/Stories/?workitem=4358
-
https://corritltd.visualstudio.com/Sporify/_workitems/edit/5454
-
https://corritltd.visualstudio.com/Sporify/_workitems/edit/5455