Description
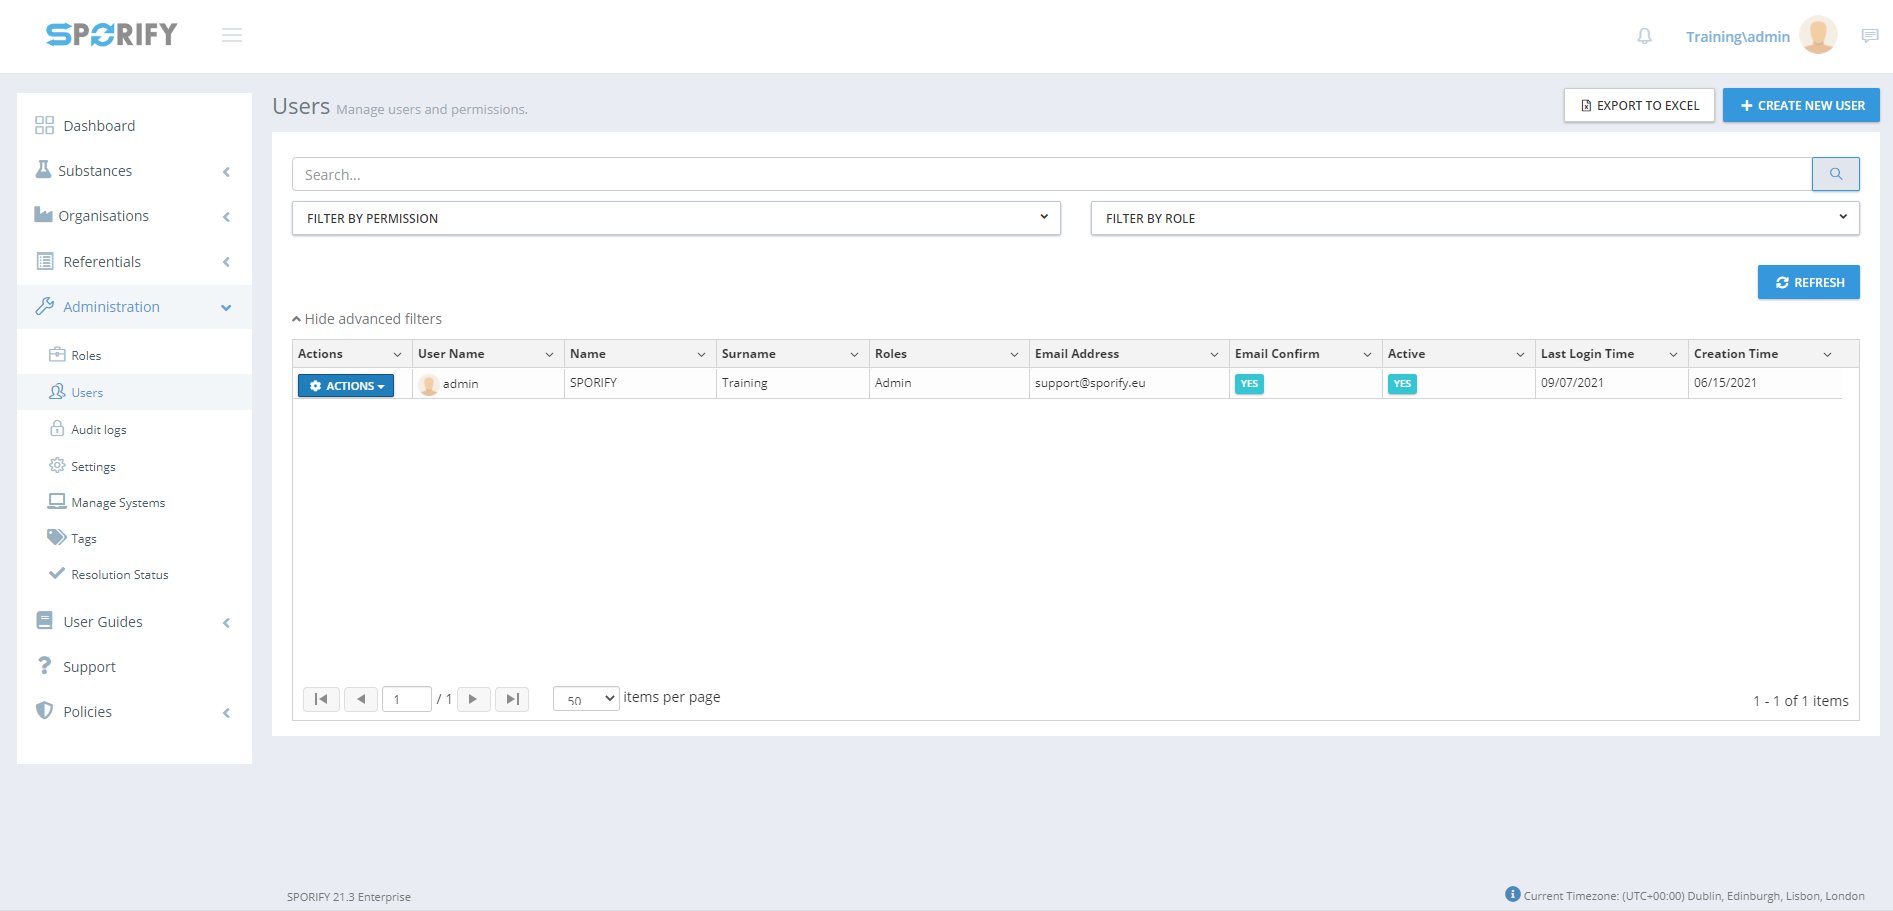
In SPORIFY, the administrator can view and manage the users from their tenant in the Administration Users area of the system.
-
Note: This feature is helpful when troubleshooting user queries or working on another user's behalf. All actions carried out while an administrator is logged into another user’s account are clearly labelled in the audit log: “This operation is performed by another user on behalf of this user.”
Procedure
-
Login to SPORIFY.
-
Click Administration on the navigation menu.
-
Click Users.
-
The presented list of users can be filtered by clicking Show advanced filters. These filters are as follows:
-
Filter by Permission
-
Filter by Role
-
-
Click Refresh.
-
Specific users can also be found by typing their details into the search bar, then clicking the search button.
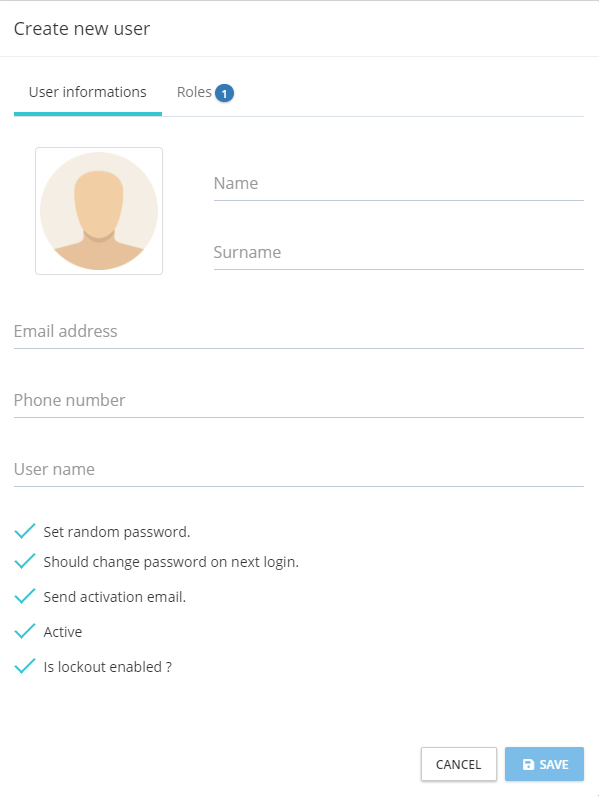
To create a new user:
-
Click the Create New User button.
-
Select the User informations tab.
-
Insert the following information in the associated fields:
-
Name
-
Surname
-
Email address
-
Phone number
-
User name
-
-
Check/uncheck the associated checkboxes to enable/disable the following security settings:
-
Set random password.
-
Should change password on next login.
-
Send activation email.
-
Active.
-
Is lockout enabled?
-
-
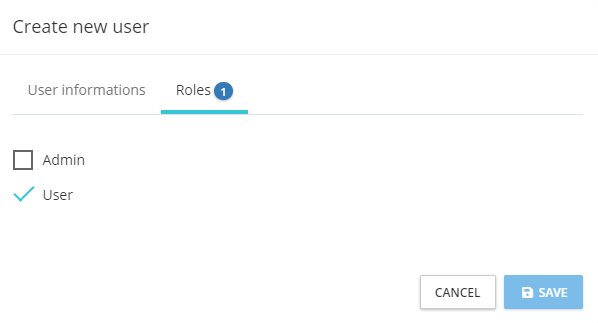
Select the Roles tab.
-
Check the checkbox associated with the role that will be assigned to the new user.
-
Click Save, else Cancel.
To edit a user:
-
Click the Actions button beside the desired user’s listed username.
-
Select Edit.
-
Use the provided fields to make the edits.
-
Click Save, else Cancel.
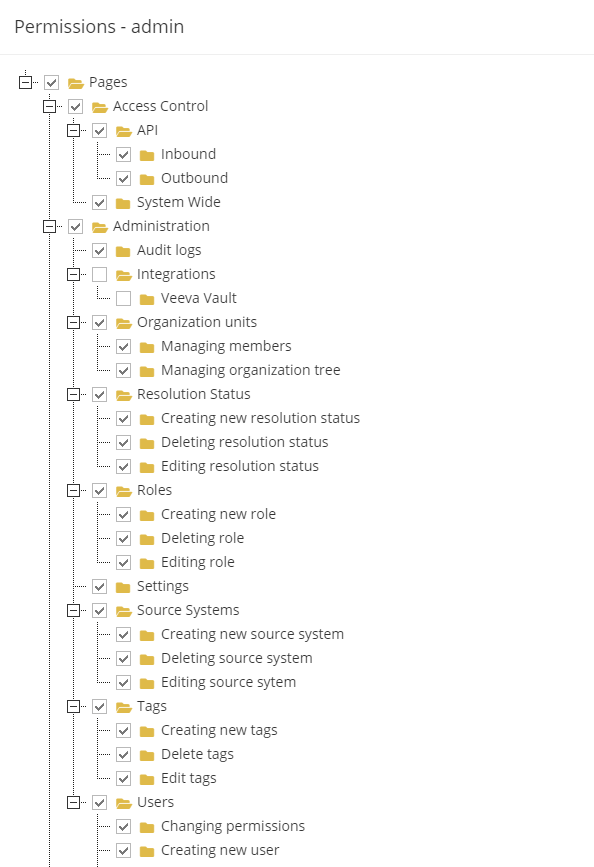
To update a user’s permissions:
-
Click the Actions button beside the desired user’s listed username.
-
Select Permissions.
-
Check any listed permissions to assign them to the given user.
-
Uncheck any listed permissions to remove them from the given user.
-
If the Reset Special Permissions button is clicked, user specific permissions settings are immediately reset.
-
Click Save, else Cancel.
To unlock a user:
-
Click the Actions button beside the desired user’s listed username.
-
Select Unlock.
-
A message will appear on the screen informing the administrator that the given account has been unlocked.
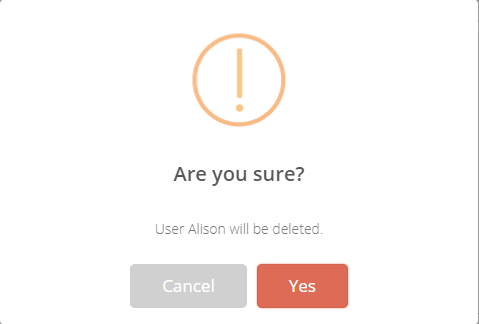
To delete a user:
-
Click the Actions button beside the desired user’s listed username.
-
Select Delete.
-
A modal asking ‘Are you sure?’ will appear.
-
Click Yes, else Cancel.
To export the Users table to Excel:
-
Click the Export to Excel button.
-
The list will download directly to the administrator’s device.
Password management
When users or administrators configures a password for an account, the mandatory username and password is consumed via the front end of SPORIFY. While saving the username and password, both values are securely transmitted via encrypted SSL connection from the local browser of the user to the SPORIFY server.
The SSL connection is secured with TLS Elliptic Curve Cipher Suites with SHA-256/384 and AES Galois Counter Mode as defined in RFC-5289. The web-server of SPORIFY uses a public trusted X509 certificate with RSA algorithm and keysize of 2048 to enable clients to verify the authenticity of the established connection to SPORIFY.
The SPORIFY server encrypts the users passwords explicitly with the hash algorithm Rfc2898DeriveBytes, using a server-side randomly generated 16 bytes salt, coded with 1000 iterations to generate the users hashed password. SPORIFY saves the hashed password value, together with the salt and the username is in the database via encrypted connection. Every time a user performs a login attempt, the user´s current given password value is hashed using the same method as described before. That recent hashed password value is then compared with the stored password value which was saved during the configuration of the account. If both values are matching, the verification is positively achieved.
Acceptance Criteria
To succeed, the administrator must be able to manage their tenant’s users in SPORIFY.
-
Verify that the Users area of SPORIFY can be accessed via SPORIFY Administration.
-
Verify that the administrator can create, edit, delete and unlock users, and change their permissions.
-
Verify that Users can be filtered by Permission and Role.
-
Verify that the presented list of users can be exported to Excel.
Related / Alternative Procedure
N/A
GUI Specification
Purpose of these GUI elements.
The purpose of these GUI elements is to enable the administrator to manage the users on their tenant.
Mockups and Screenshots
GUI Elements
|
Mockup of GUI Element |
Title |
Default |
Enabled |
Type |
Data |
Description |
|---|---|---|---|---|---|---|
|
|
Name |
Empty |
Always |
Textbox |
String |
Input Name |

|
Surname |
Empty |
Always |
Textbox |
String |
Input Surname |
|
|
Email Address |
Empty |
Always |
Textbox |
String |
Input Email Address |
|
|
Phone number |
Empty |
Always |
Textbox |
String |
Input Phone number |
|
|
User name |
Empty |
Always |
Textbox |
String |
Input User name |
|
|
Set random password. |
True |
Always |
Checkbox |
Boolean |
Activate to set random password |
|
|
Should change password on next login. |
True |
Always |
Checkbox |
Boolean |
Activate to change password on next login |
|
|
Send activation email. |
True |
Always |
Checkbox |
Boolean |
Activate to send activation email |
|
|
Active |
True |
Always |
Checkbox |
Boolean |
Activate to make user active |
|
|
Is lockout enabled? |
True |
Always |
Checkbox |
Boolean |
Activate to enable lockout |
|
|
Filter by Permission |
Filter by Permission |
Always |
Drop-down menu |
String |
Allows administrator to choose permission to filter by |
|
|
Filter by Role |
Filter by Role |
Always |
Drop-down menu |
String |
Allows administrator to choose role to filter by |
|
|
Search bar |
Empty |
Always |
Search bar |
String |
Searches among users list |
.Available Actions And Commands
|
Mockup of GUI Element |
Title |
Shortcut |
Enabled |
Type |
Role/Permission |
Action |
Tooltip |
Audit Trail |
|---|---|---|---|---|---|---|---|---|

|
Create New User |
N/A |
Always |
Button |
Administration - Users |
Brings up Create New User modal |
N/A |
No |
|
|
Save |
N/A |
Always |
Button |
Administration - Users |
Saves new user |
N/A |
Yes |
|
|
Cancel |
N/A |
Always |
Button |
Administration - Users |
Cancels actions |
N/A |
No |
|
|
Reset Special Permissions |
N/A |
Always |
Button |
Administration - Users |
Resets special permissions |
N/A |
Yes |

|
Yes |
N/A |
Always |
Button |
Administration - Users |
Deletes the user |
N/A |
Yes |

|
Cancel |
N/A |
Always |
Button |
Administration - Users |
Cancels elimination of user |
N/A |
No |
|
|
Actions |
N/A |
Always |
Button |
Administration - Users |
Shows drop-down list of actions |
N/A |
No |
|
|
Export to Excel |
N/A |
Always |
Button |
Administration - Users |
Exports Users list to Excel |
N/A |
Yes |
|
|
Refresh |
N/A |
Always |
Button |
Administration - Users |
Refreshes screen |
N/A |
No |
Related Documentation and Sources
N/A
Specification References