Installation Qualification 23.1.2.1 Validation
Download as PDF |
Procedure
How to use this document
This document is based on a template which is designed to be applied to a wide variety of scenarios, including external customer validation. The template and scenarios included can be easily adapted for use in various situations. The following section contains additional definitions of terms used in this document as well as a Process Flow describing how the template is to be used during system validation.
Process Flow
The Installation Qualification document is created to provide the steps required to successfully deploy the Software. The Executor fills in the required information about the environment on the overview page. The validation test cases are executed, and the results are noted down in the “Results” column of the Test Case Table (Pass/Fail/Not Applicable), followed by comments if needed. In case of FAIL, findings shall be tracked within the comments section, all failures need to be resolved and this document needs to be executed again. Whether a FAIL is preventing from continuing the validation process and going into Production or not, will be determined by the System Owner. Once the script is fully executed, the overall result is recorded on the Validation Summary Page and the script is saved, printed as PDF, electronically signed, and securely stored.
Prerequisites
The primary actor must have an AWS IAM account set up.
The primary actor must have access to the relevant SQL scripts.
The primary actor must have a Visual Studio account linked with CorrIT set up.
Software Release (YY.V): 23.1.2.1
Software Installation Qualification for Environment
- Development (DEV)
- Quality Assurance (QA)
- Production (PRO)
Server Host Name: Production AWS Beanstalk
Installation Date (YYYY-MM-DD): 2024-04-14
Master Signatures
The Master Signatures section identifies each individual present and involved in the documented installation process. Each individual shall be identified by hand-written last name, first name, company and department/role as well as their signature in the following tabular overview. The Signature ID column shall be used as a unique identifier for the resource to allow easy references within subsequent parts of this documentation. Using personal initials as Signature ID is suggested.
Name | Company | Department/Role |
|---|---|---|
CorrIT Ltd. | Development / Executor | |
CorrIT Ltd. | Development / Observer |
Steps
Steps to perform | Expected Results | Not Applicable (N/A) / Pass / Fail | Comments | |
|---|---|---|---|---|
| 1 |
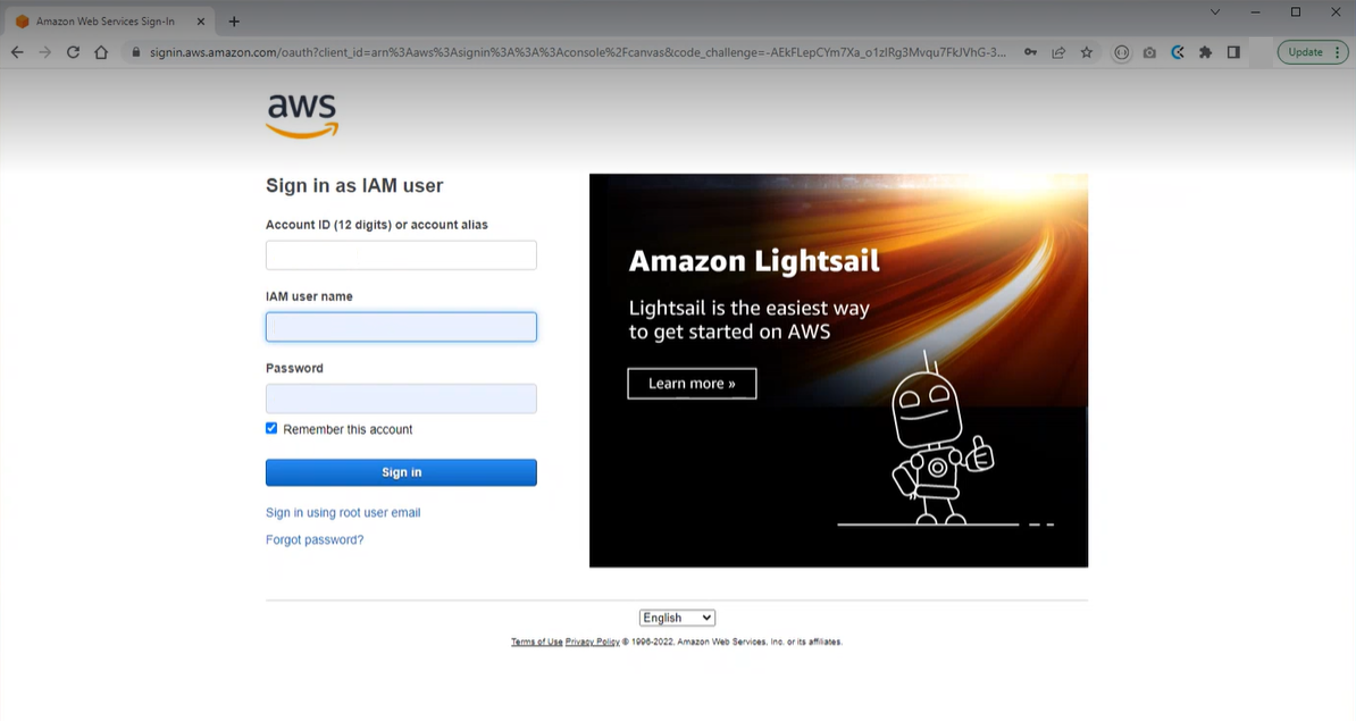 AWS Login Page
.png?inst-v=aacdda6c-010e-4485-90a3-360b22ca735e) AWS MFA Authentication | User is signed in with according permissions. |
| |
| 2 |
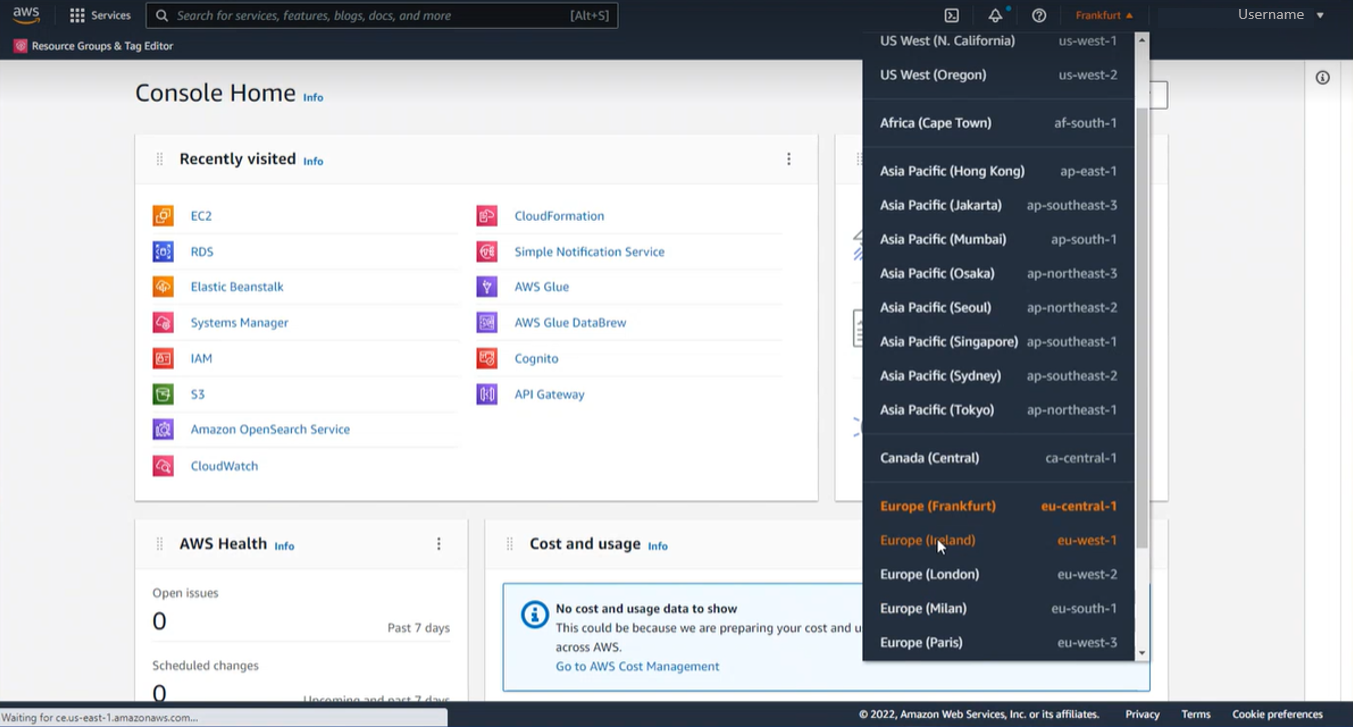 Region Select | The according region is selected. |
| |
| 3 |
 Amazon Relational Databases
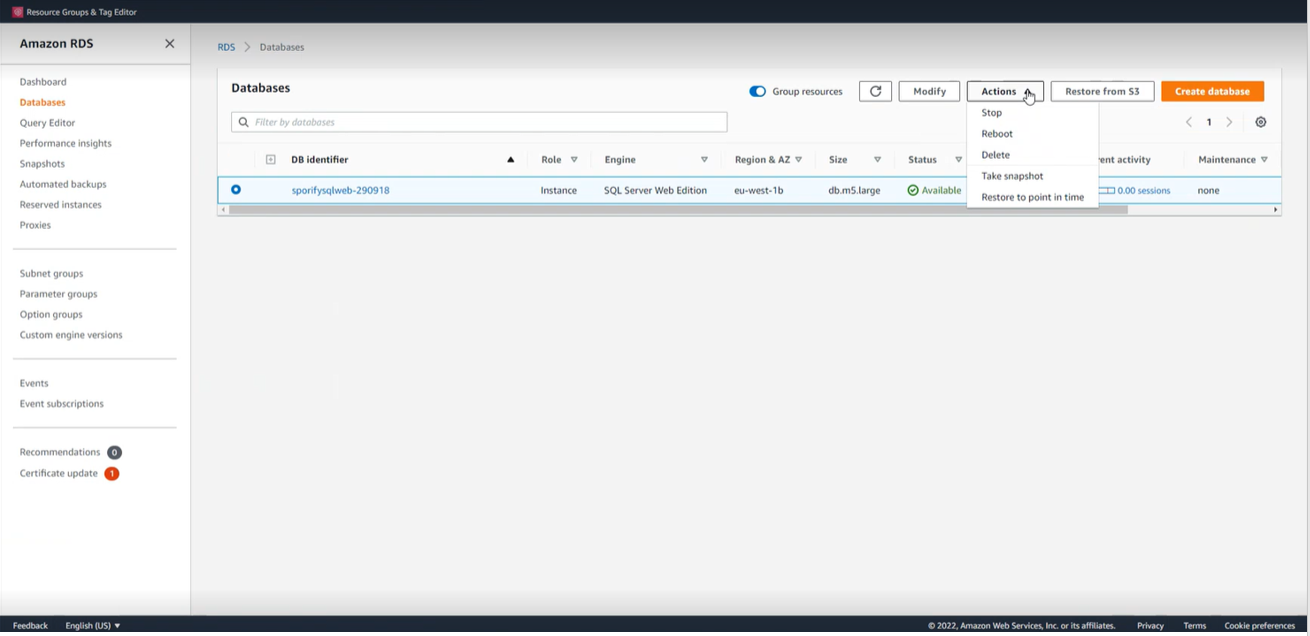 AWS RDS Snapshot
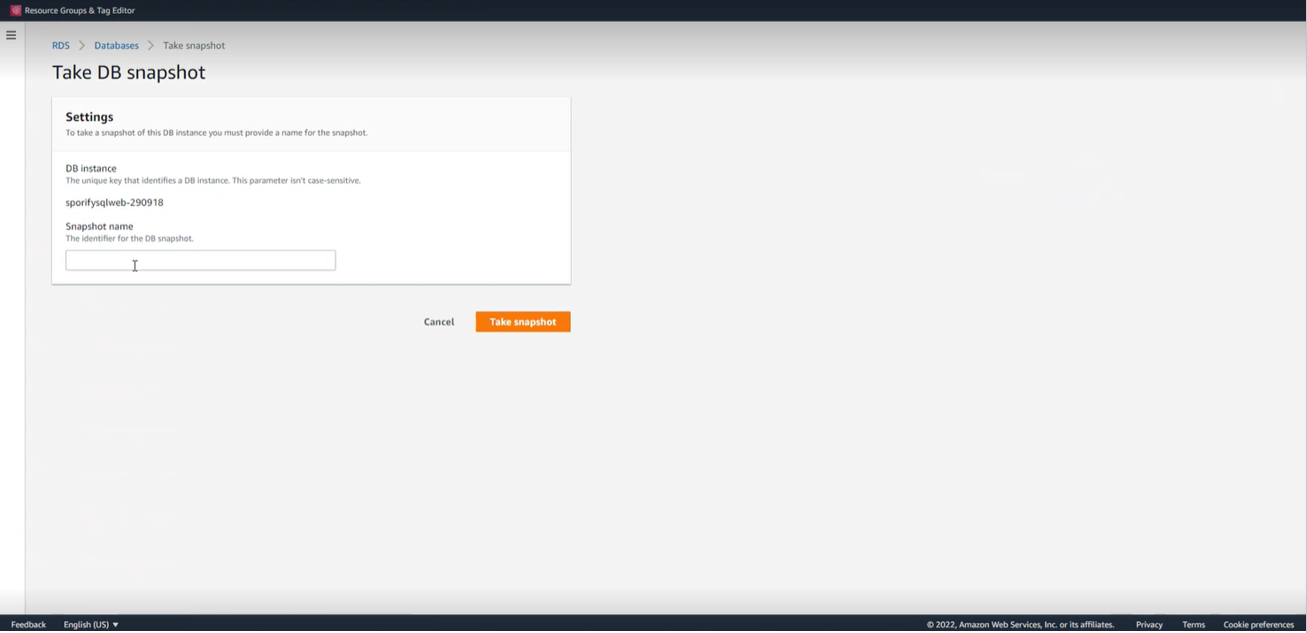 AWS Snapshot Creation
|
| ||
| 4 |
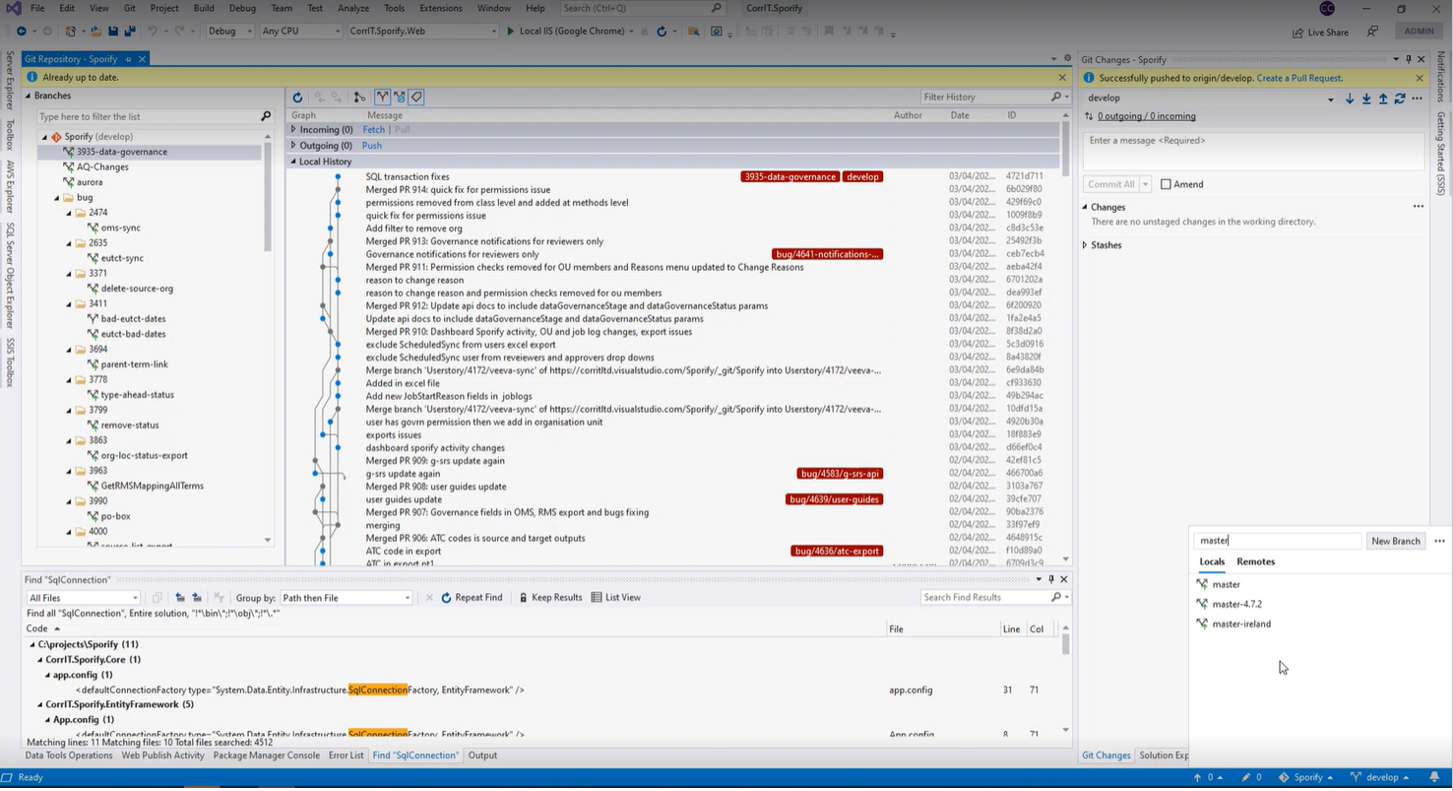
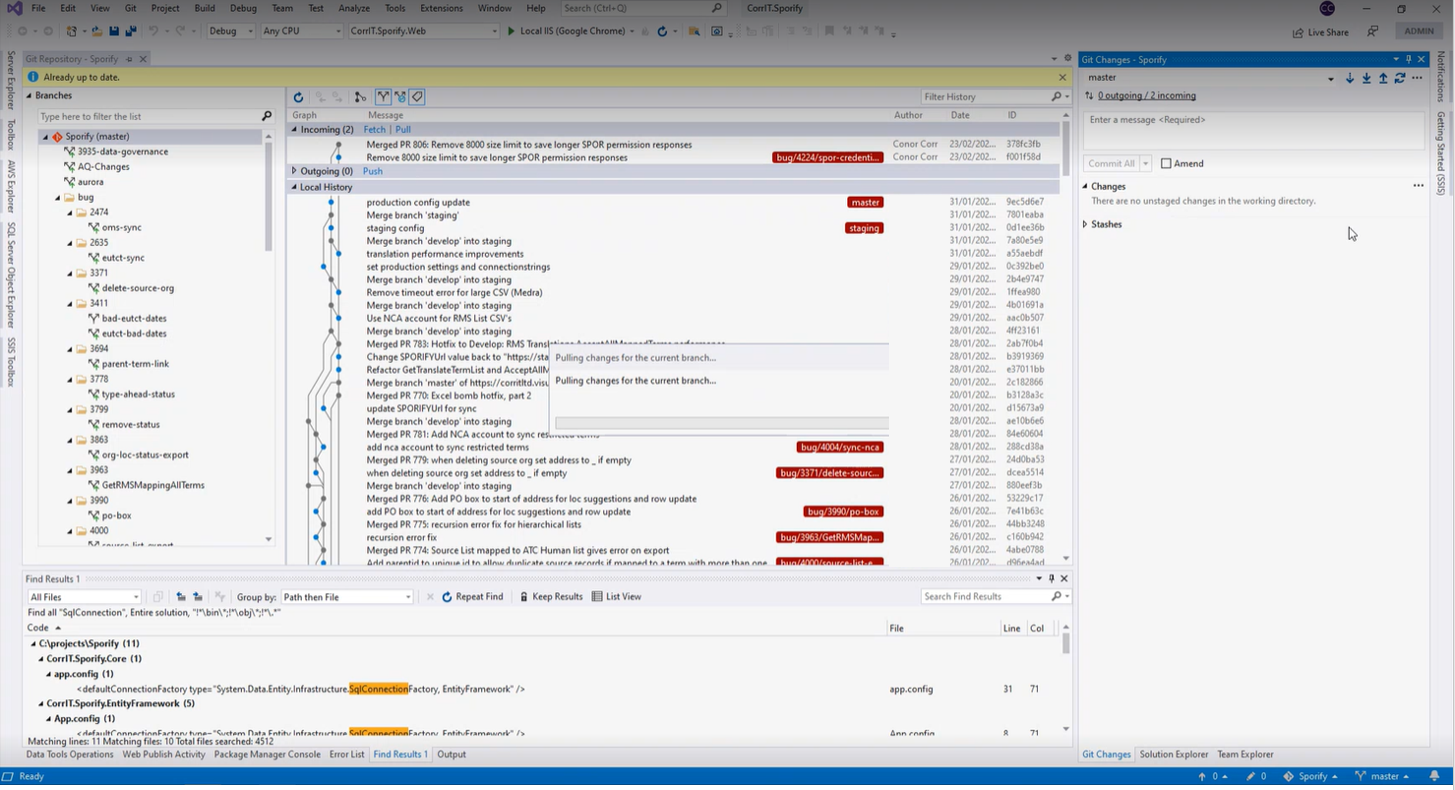 | Local Git Checkout in Visual Studio is up to date. |
| |
| 5 |
.png?inst-v=aacdda6c-010e-4485-90a3-360b22ca735e) | Ensure the Validation Branch is not missing relevant changes. In case of deviation, refer to the merge actions in SOP SOP - DEV-009/00 - Product Deploy. |
| |
| 6 |
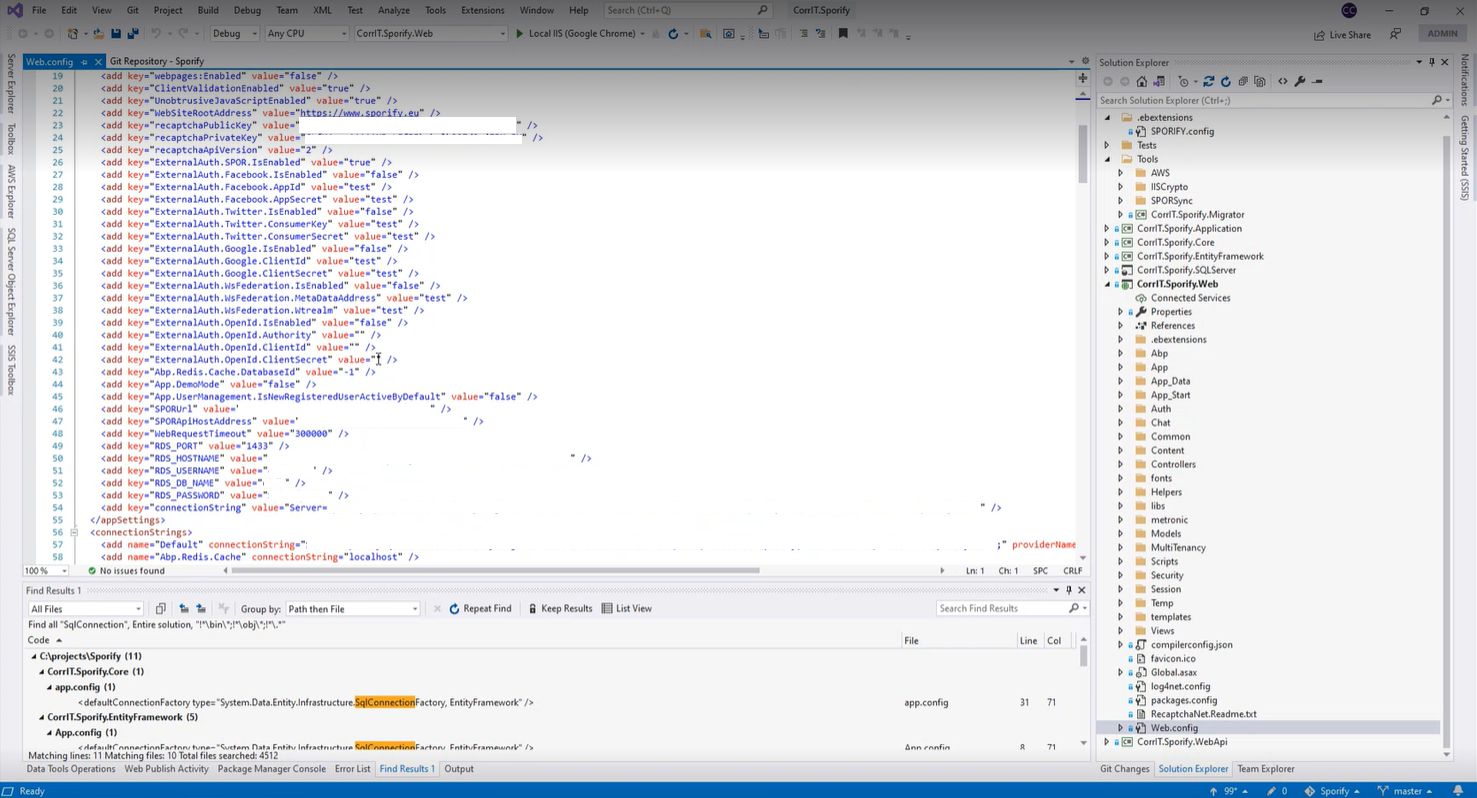 Web Configuration
| All configurations are pointing to the stage specific database. |
| Used validation environment configuration |
| 7 |
| All configurations are pointing to the stage specific database. |
| Used validation environment configuration |
| 8 |
| No issues in the build process are displayed. |
| |
| 9 |
.png?inst-v=aacdda6c-010e-4485-90a3-360b22ca735e) AWS Elastic Beanstalk Modal
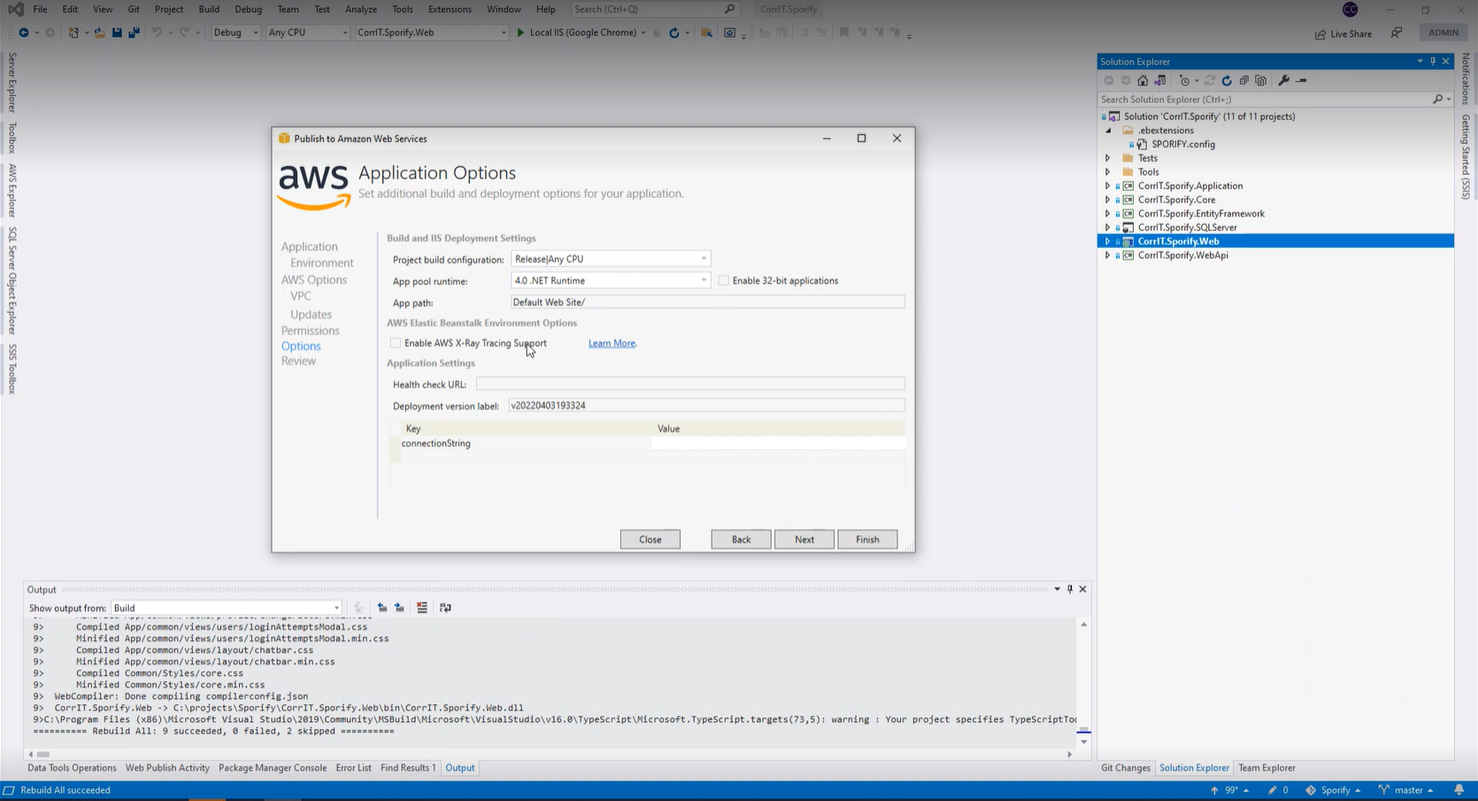 Application Options Modal
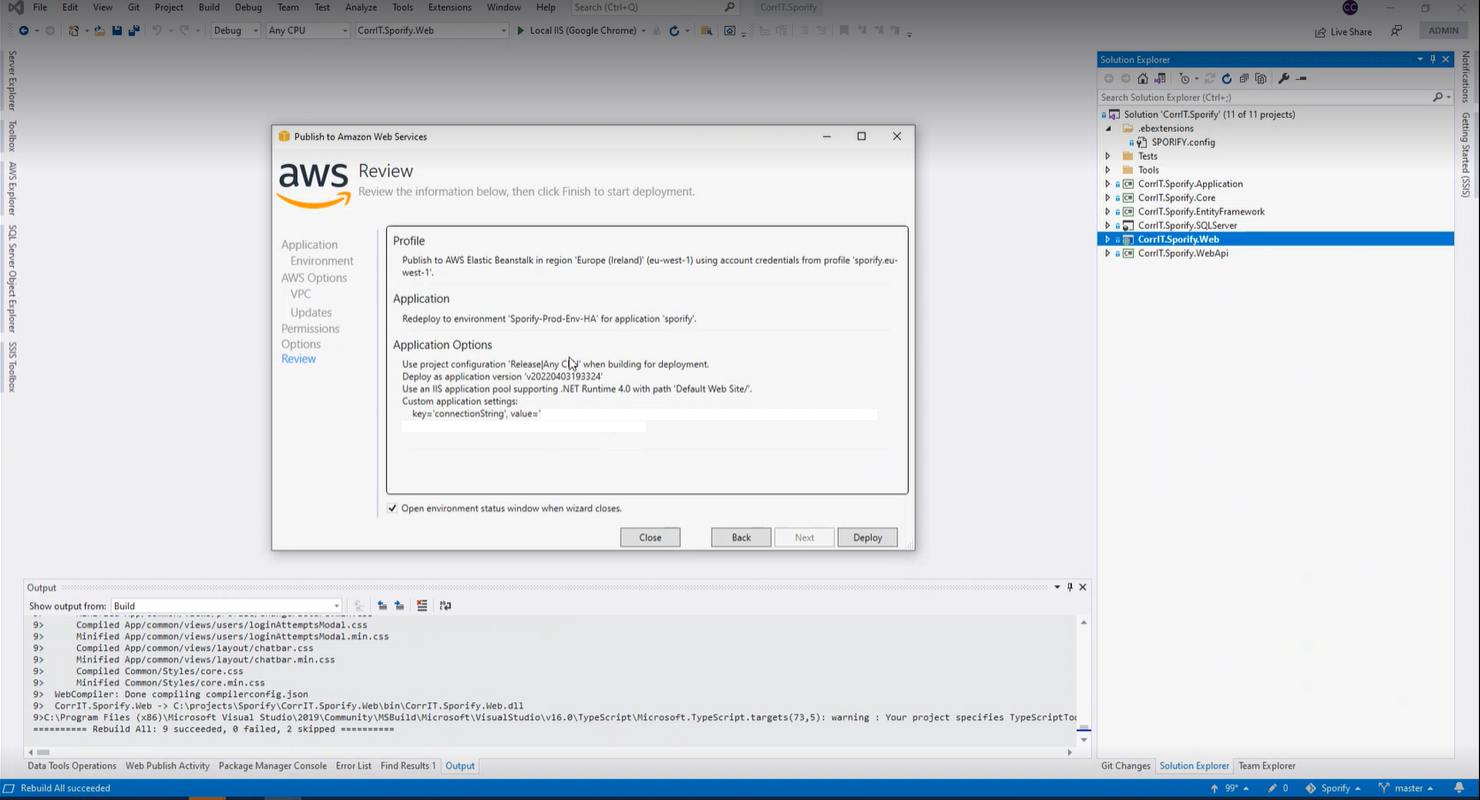 Review Modal | CorrIT.Sporify.Web is published without any errors. |
| Used validation environment configuration |
| 10 |
 Package Manager Console
 Code Updates | Database code is updated without any errors. |
| |
| 11 |
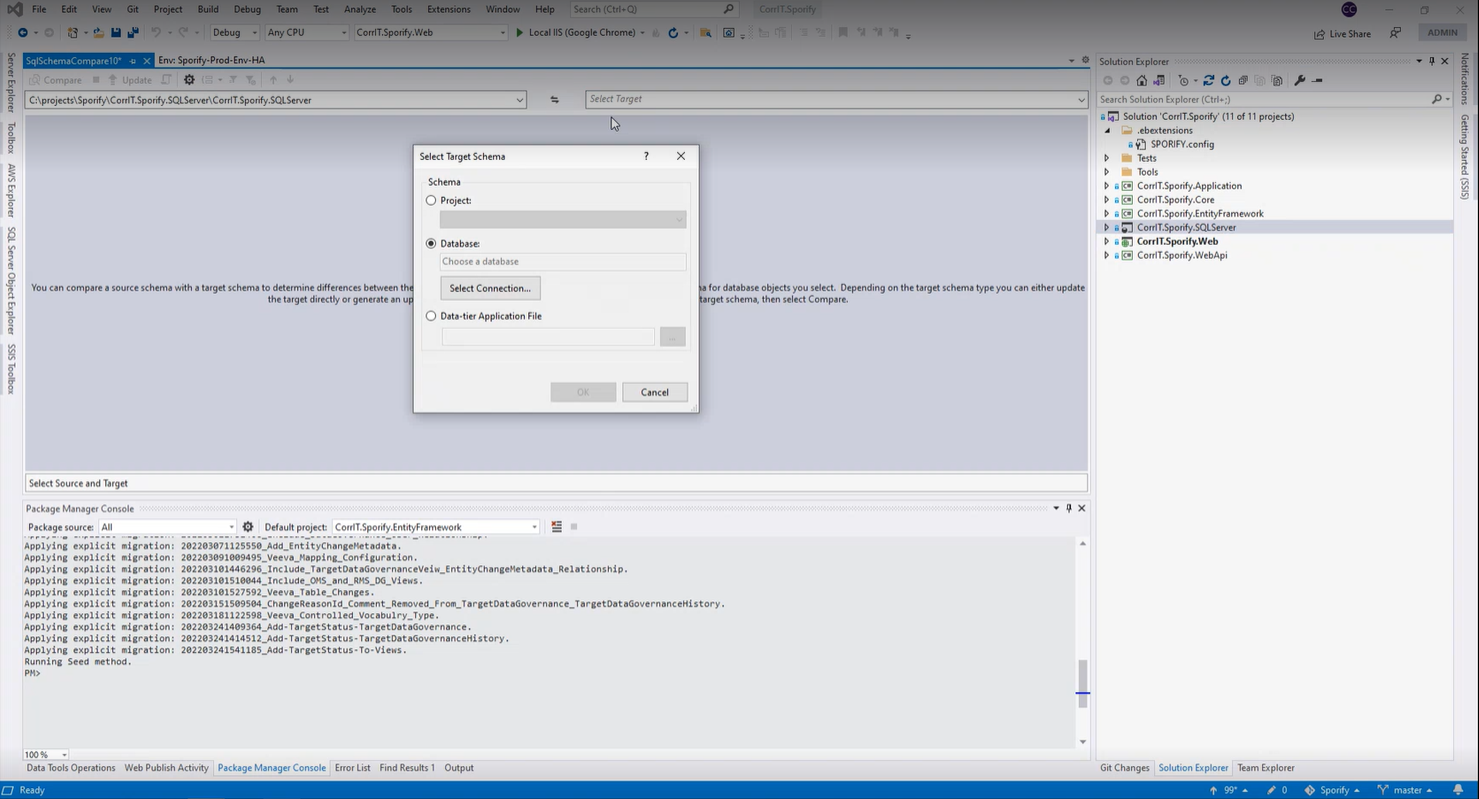 Schema Compare
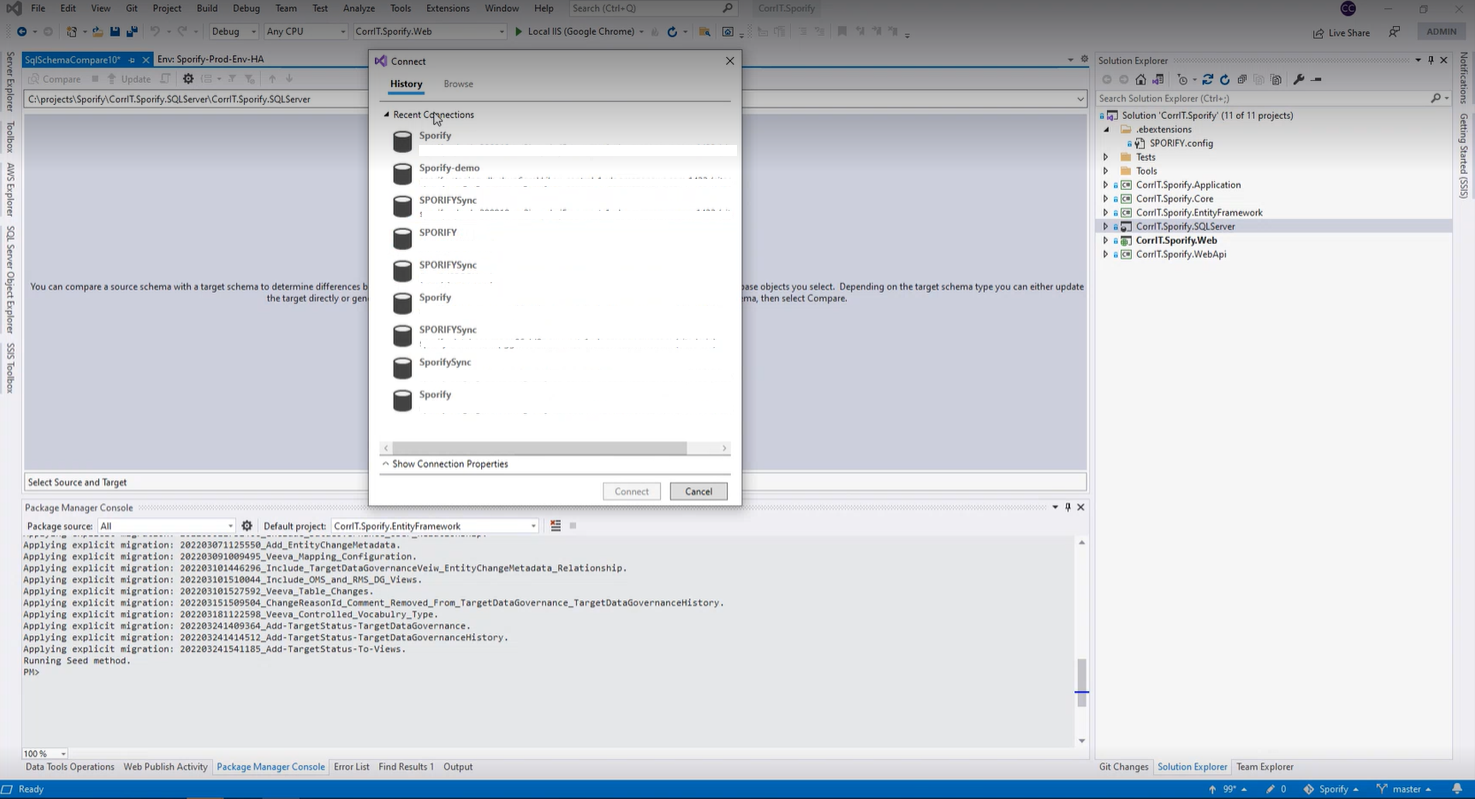 Schema Compare Connection Options
| No schema differences are displayed. When differences appear, execute the specific SQL update scripts as defined in the next step. |
| |
| 12 |
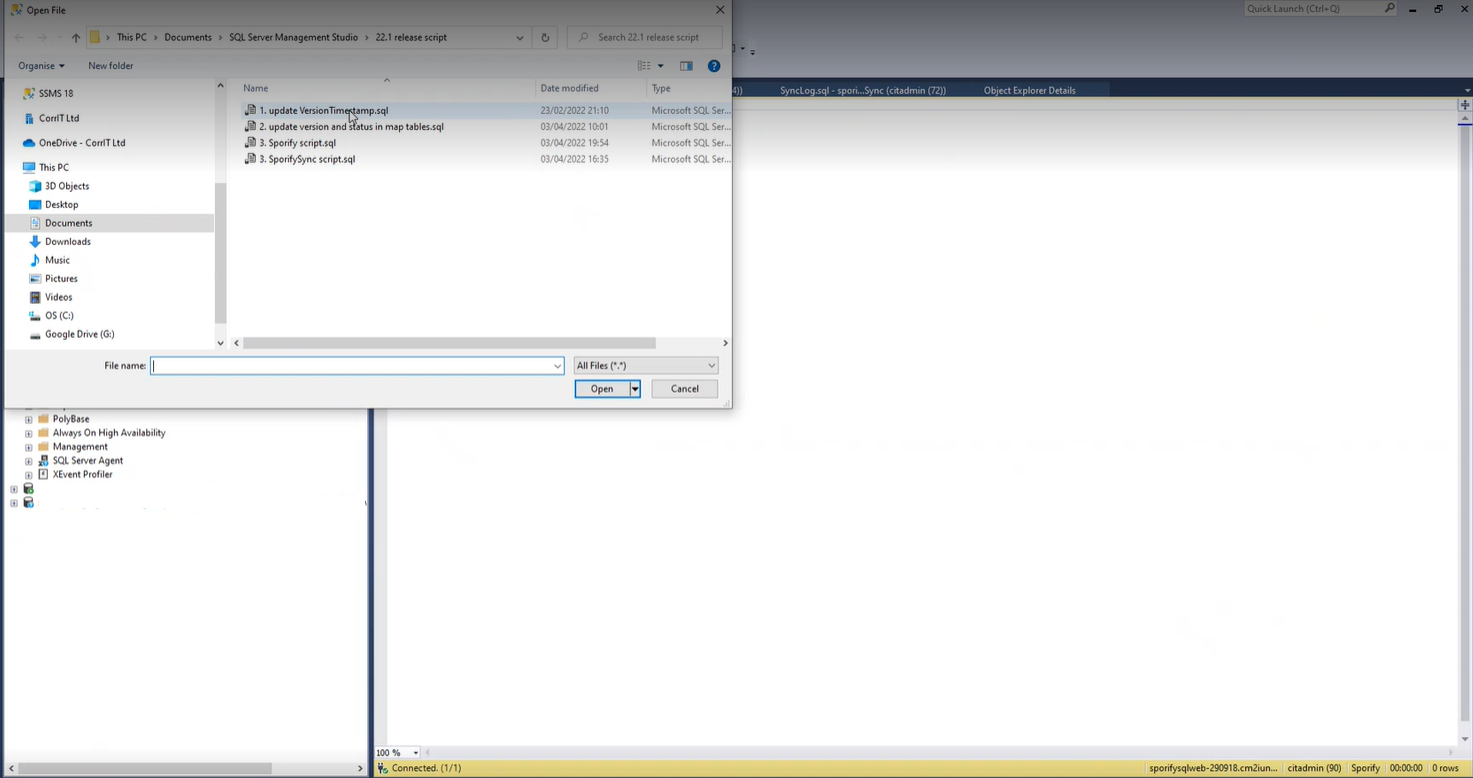 SQL Script Selection
 Execute Script
| Each script is updated without any errors. |
| |
| 13 |
| The version number is updated to the software version, all features and documentation pages are available. |
|
Validation Summary
Summary / Results | Please provide a short summary of the results (e.g., script passed/failed without/with findings) |
|---|---|
| The steps was executed with a pass result |
Definition of Terms
Release: The distribution of the final or newest version of a software application.
Snapshot: The state of a system at a specific point in time.
Deployment: All of the steps, processes, and activities required to make a software system or update available to users.
Schema Compare: A comparison of two database definitions.
Abbreviation
SOP: Standard Operating Procedure
AWS: Amazon Web Services